- What Is the Windows Command Prompt?
- How to Open the Windows Command Prompt
- Basic but Powerful CMD Commands to Try Out
- Summary of Basic CMD Commands
- CMD Commands for Managing Files and Directories
- Summary of CMD Commands for Managing Files and Directories
- Advanced Windows Command Prompt commands for Power Users
- Summary of the Advanced Command Prompt Commands
- Take the Windows Command Prompt to the Next Level
- FAQ
The Windows Command Prompt is a powerful yet often underutilized tool. It offers a highly useful under-the-hood look at your system and allows you to manipulate its operations directly.
The Command Prompt’s blank, monochromatic interface might seem intimidating at first. However, don’t let its simplistic appearance fool you. Mastering this tool can yield immense benefits.
Whether you are an IT professional troubleshooting network issues, a software developer orchestrating system processes, or a curious computer enthusiast keen to dig a little deeper, having a Windows Command Prompt cheat sheet like this one can make your PC experience substantially more fulfilling.
What Is the Windows Command Prompt?
To fully appreciate the power of the Command Prompt, we first need to define it. So, what exactly is the Windows Command Prompt?
It is a Windows command-line interface (CLI) program where you can execute a vast array of basic and advanced CMD commands.
The Windows Command Prompt works by processing commands you type in and then performing actions based on those commands.
These Windows CMD commands are instructions to your system, allowing you to interact directly with your computer’s operating system.
They can do anything from managing files to checking your IP address to even repairing system files.
How to Open the Windows Command Prompt
Method 1: Using Windows Search
The easiest way to open the Command Prompt is through Windows Search. Simply follow these steps:
Click on the Start menu or press the Windows key on your keyboard and type cmd into the search bar. You will see two options to open the Windows command line here: Open and Run as administrator. Use the Open option to run CMD normally. However, if the command you’ll use requires system permission or administrative rights, select Run as administrator.

Method 2: Using the Run dialog box
Press Windows key + R on your keyboard to open the Run dialog box. Type cmd and press Enter to open the Command Prompt without administrative privileges.

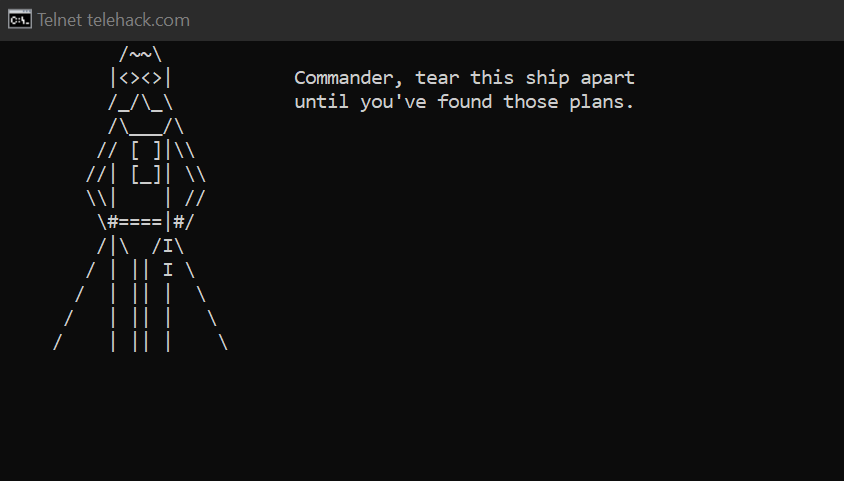
Ctrl + Shift + Enter instead of just Enter. This will launch the Command Prompt with administrator rights.After opening the Command Prompt, you can start typing in useful CMD commands to perform tasks or even funny ones that can even allow you to watch a command-line version of Star Wars.
The Command Prompt has over 280 CMD commands depending on your operating system. While it might seem impossible to list all the commands, we will try to cover the most important ones.
We’ll cover 45 of the most essential Windows CMD commands, from basic navigation to advanced user account management and automation.
Basic but Powerful CMD Commands to Try Out
We start with very basic Command Prompt commands. But don’t let the name fool you; some of these commands can help you do so much:
Command 1: HELP
The help command provides a list of commonly used commands and their functions. To view this CMD commands list with commonly used commands and their functions, simply type help and press Enter.
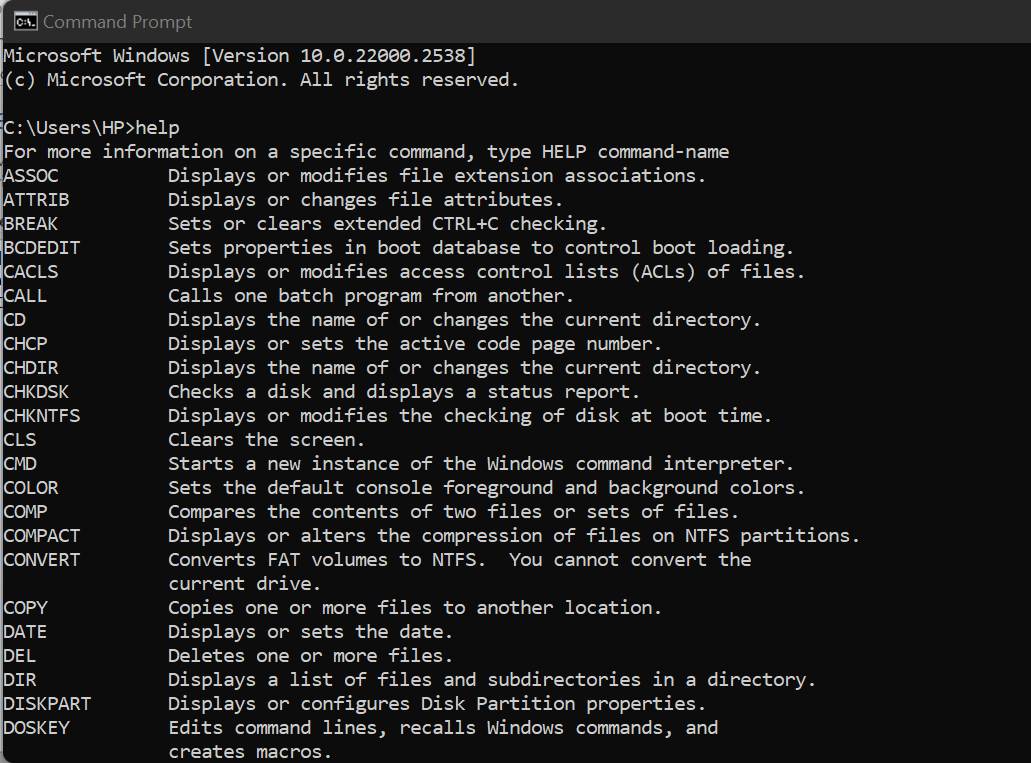
In Windows 10 and 11, typing help typically displays around 30–40 built-in command-line commands. You may not find anything too advanced on the list. That said, the help command does not give detailed information.
If you want more details, or the command you need is not on the list, type the command followed by /?. For example:
ipconfig /?
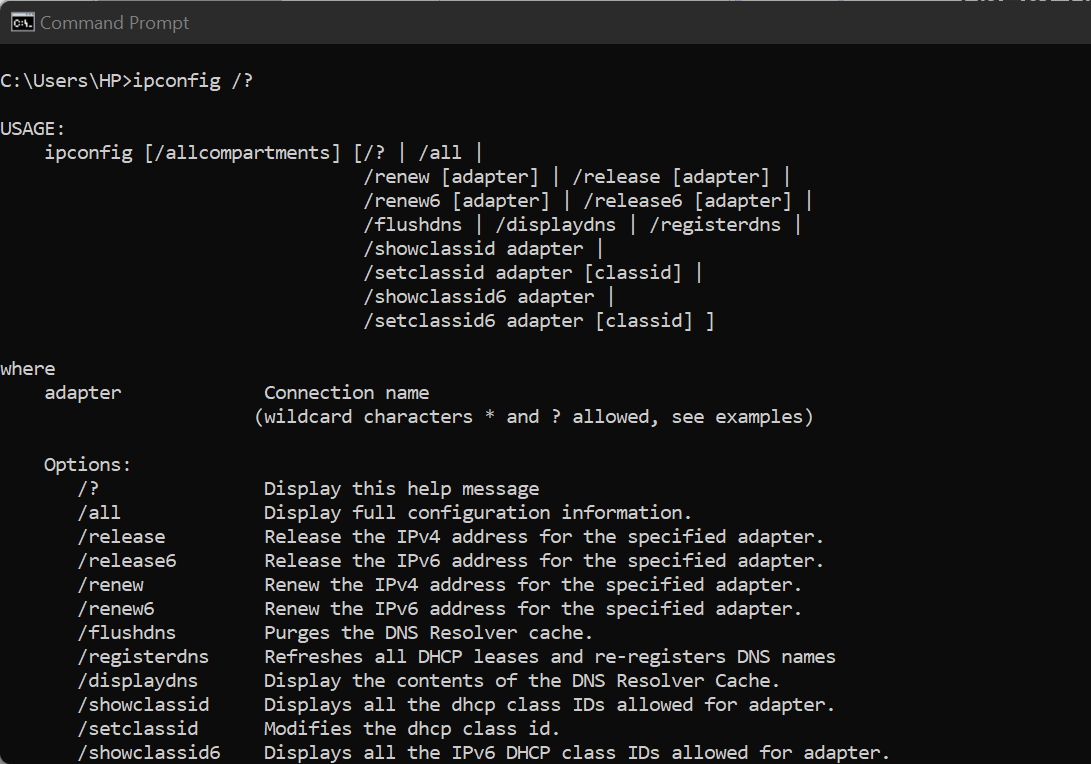
Command 2: IPCONFIG
When you type ipconfig into your Command Prompt in Windows, you receive a list of all network interfaces on your PC with their respective IP addresses.
However, if you’re on a local network (which is common for most home and office computers), it’ll display your local network address.
Its real power lies in extensions:
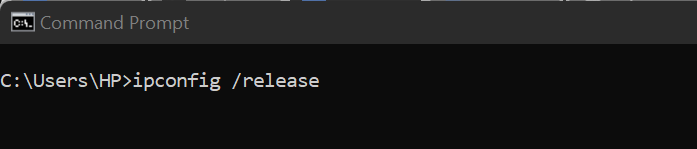
- ipconfig /release: Disconnects your device from its current IP address.
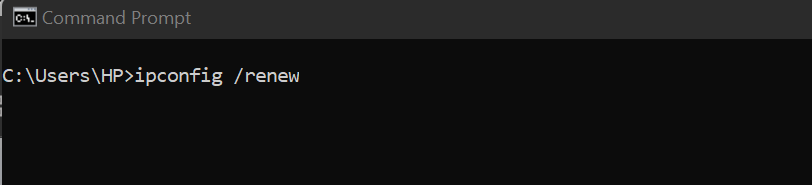
- ipconfig /renew: Asks for a new IP address after the old one is released.
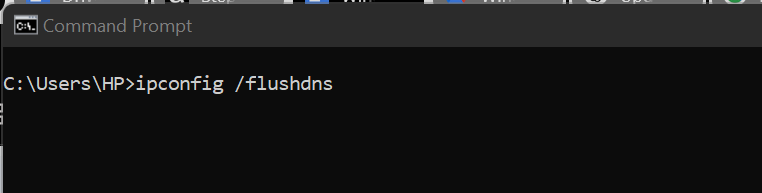
- ipconfig /flushdns: Clears saved website addresses to fix connection issues.
Command 3: PING
Ping is one of those CMD commands for testing the connection between your computer and a network host (like a website server). For gamers and anyone who needs a fast and stable internet connection, this command is very important.
The command tests the connection between your computer and a network host (like a game or website server) by sending small data packets and measuring how long it takes to get a response.
So running a ping test helps identify network issues to help you find ways to improve speed. For gamers, reducing high ping is crucial for smooth gameplay, making ping a valuable tool for troubleshooting and improving internet performance.
To use the command, type:
ping www.google.com

The results will tell you how good your ping is.
Command 4: NETSTAT
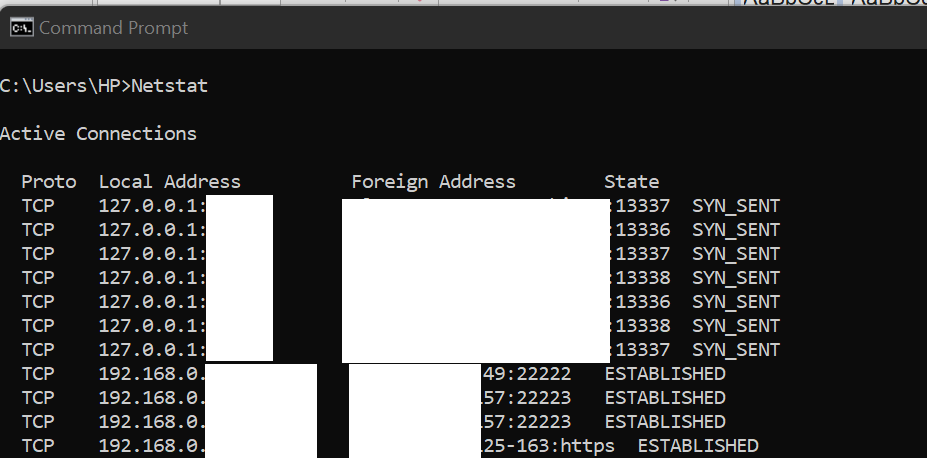
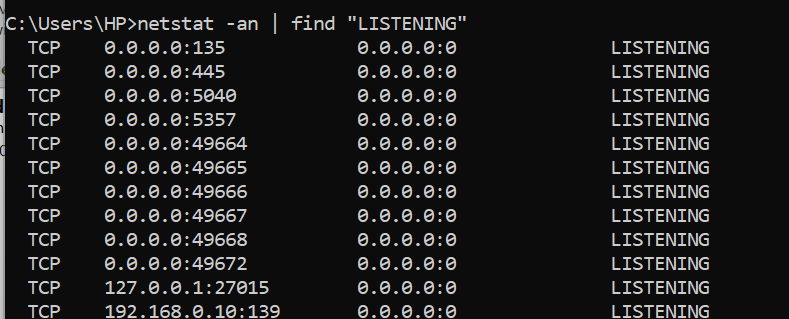
Netstat is a good CMD command for monitoring network statistics. It displays active connections, listening ports, and network interface statistics to provide a snapshot of your network’s current activity.
This command can come in handy if you suspect your network’s security has been compromised. To find security threats using the netstat command, you can go further with:
netstat -an | find "LISTENING"
Lists all open ports to identify unauthorized services that may be exposed to the network.
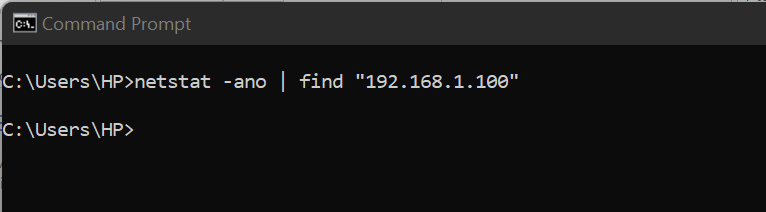
netstat -ano | find "<IP>"
Checks if a specific IP is making too many connections, which could indicate suspicious activity like malware or a botnet. Replace <IP> with your IP address to test.
For multiple connections from one IP, use a Whois domain lookup to check the IP’s owner. If it seems suspicious or you’re not sure, compare the IP address with Maxmind’s database. Block the IP if it’s dangerous.
Command 5: TRACERT
Tracert, short for Trace Route, is a valuable command when diagnosing network problems. It traces the path data takes from your computer to a destination host.
For instance, if you type tracert www.google.com into the Command Prompt, it will trace the path your data takes to reach Google’s servers.
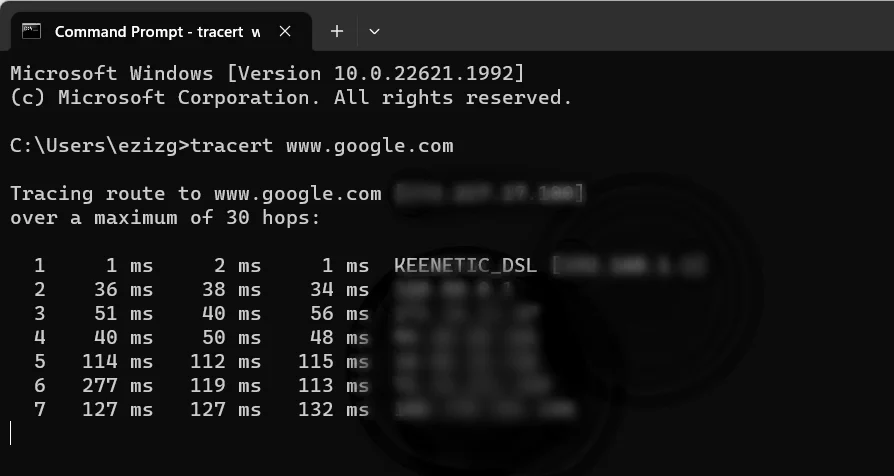
The following are some issues that the test might show you:
- High latency: If one hop shows a round-trip time of 200ms, and others show 20ms, this could mean there’s a delay at that particular hop.
- Timeouts at a hop: If you see timeouts (with * * *) at the same point in the route, it could mean there’s a problem with that hop or the ones before it.
- Destination not reached: If the trace doesn’t reach the final destination, it could mean there’s a problem with the routing or the server you’re trying to reach is down.
To fix high latency, contact your ISP or check if there’s too much traffic on the network. For timeouts at a hop, make sure your router isn’t blocking requests, or reach out to your ISP if it’s their router. If the destination isn’t reached, check if the server is down or if there’s a routing issue on your network.
Command 6: NSLOOKUP
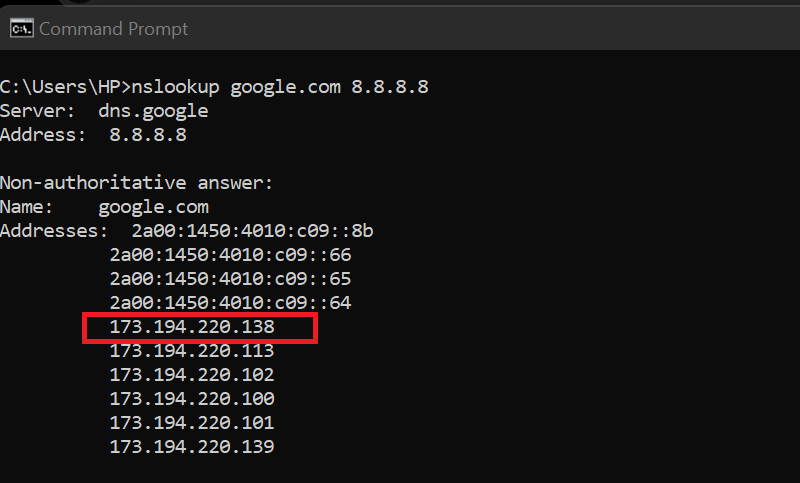
Nslookup is an essential tool for network troubleshooting, often used to obtain domain name or IP address mapping. It can provide information on where a web service is hosted, which is useful for diagnosing DNS resolution issues.
If you type nslookup www.google.com, you’ll receive the IP address of Google’s servers, indicating where their service is hosted.
Beyond checking server location, nslookup can help detect DNS attacks. If a trusted site like google.com resolves to an unknown IP outside Google’s typical ranges (e.g., 142.250.x.x, 173.x.x.x), it could indicate DNS hijacking. To verify, run nslookup google.com 8.8.8.8 and check if the IP belongs to Google using the Whois domain lookup.
Command 7: CHKDSK
Chkdsk, short for Check Disk, is mainly used to scan, detect, and repair file system errors and bad sectors on a hard drive. It ensures the integrity of the file system and can help fix issues related to corrupted files or physical drive problems.
For instance, if you experience repeated episodes of blue screen errors, it might be a sign of underlying disk issues such as file system corruption or bad sectors. Running chkdsk can help identify and repair these problems, potentially restoring system stability.
To troubleshoot with chkdsk, open the Command Prompt as an administrator:
Then type the command:
CHKDSK
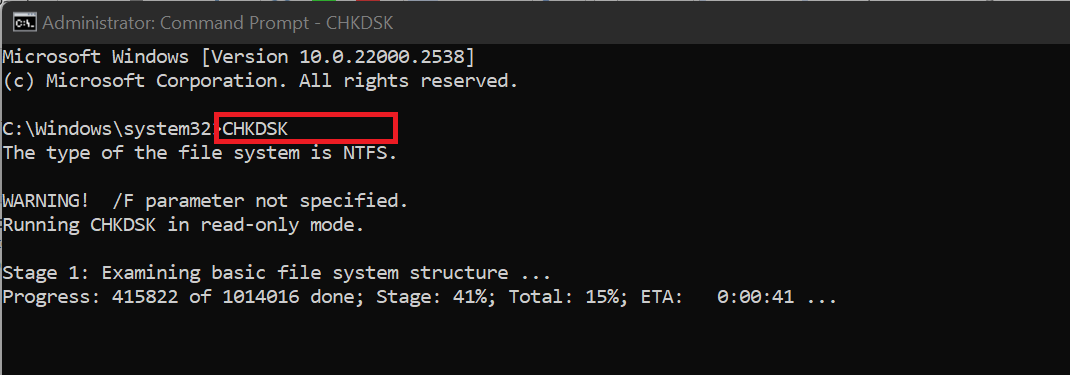
With this command, your computer will begin scanning your hard drives for any errors. The command only detects issues with your disk without fixing them.
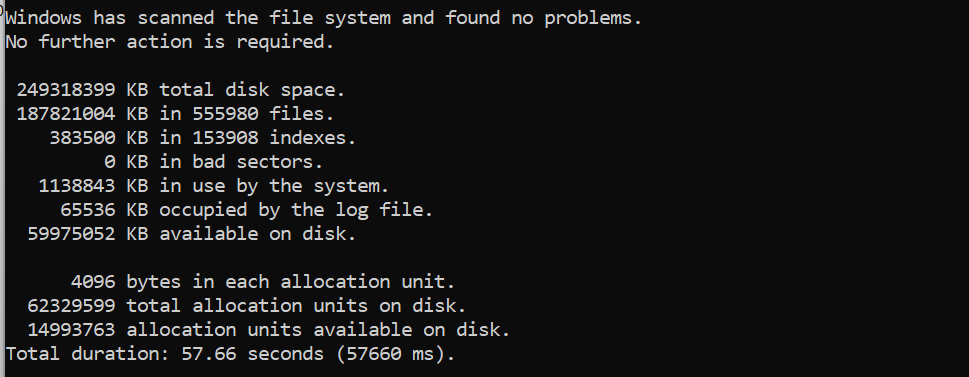
If the scan finds errors on your disk, you need to use these additional parameters to fix the errors:
chkdsk /f
Fixes file system errors.

chkdsk /r
Looks for damaged parts of the drive and tries to save any readable data.
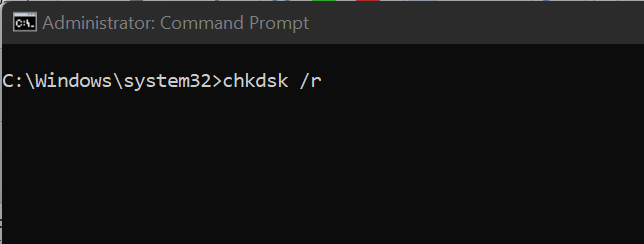
Command 8: SYSTEMINFO
The systeminfo command provides comprehensive information about your system. It outputs detailed data, including OS name, version, manufacturer, installed hotfixes, and hardware resources like memory and network card specifications.
This can be useful when troubleshooting system issues or simply checking your computer’s specs.
Command 9: SFC /SCANNOW
Sfc /scannow is one of the CMD prompt commands for repairs. It allows you to scan and fix any corruption in Windows system files. This command checks the integrity of these files and, if necessary, replaces them with the correct versions.
If your Windows system is acting slow, typing sfc /scannow into the Command Prompt might help fix the issue. The command will scan all protected system files and replace corrupted ones with a cached copy located in a compressed folder at %WinDir%\System32\dllcache.
Like chkdsk, you must be an administrator to run an SFC scan. So, open the Command Prompt with administrative privileges, and then type: sfc /scannow.
Command 10: TASKLIST
The tasklist command displays a list of all currently running processes on your computer. It is a valuable tool for diagnosing system performance issues, as it allows you to identify processes consuming excessive resources.
For example, if your system is running slowly, you can use tasklist to check for high CPU usage, memory, or disk usage by specific processes. This helps pinpoint applications or background tasks that may be causing performance bottlenecks.

Command 11: TASKKILL
Taskkill, as its name suggests, allows you to terminate tasks or processes directly from the Command Prompt. It’s an incredibly useful CMD command for forcefully stopping unresponsive programs or those causing system instability.
For example, let’s say you were using Skype and it stopped responding. You can force it to close by typing the following command in the Command Prompt:
taskkill /IM skype.exe /F

Command 12: FORMAT
The format command is used to erase all data on a disk and prepare it for use by setting up a new file system. This command is essential when you need to clean a drive, change the file system (e.g., from NTFS to FAT32), or resolve disk errors.
To start, type the following command:

FORMAT D: /FS:NTFS
This will format drive D: with the NTFS file system.
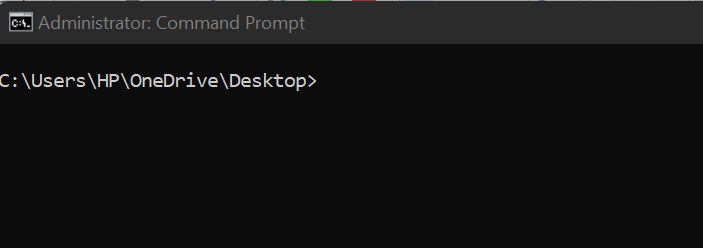
Command 13: CLS
If you have tried all of these commands up to this point, your screen must be covered with several lines of text that might be distracting. To clear the Command Prompt screen, simply type:
CLS
The command will immediately wipe the screen, leaving you with a clean slate.
Command 14: TIME
The time command lets you display or set the system time. This can be helpful in situations where you cannot change your PC’s time from the taskbar.
To check the current system time, use this command:
Time

To set the system time, type the following command and replace [new_time] with the desired time (e.g., 12:30:00.00):
time [new_time]
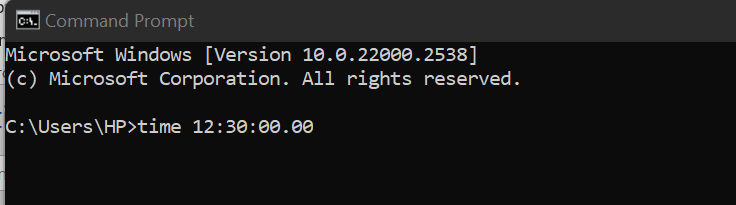
After pressing Enter, the system time will be updated to the specified value.
Command 15: SHUTDOWN
The shutdown command allows you to turn off, restart, hibernate, or log off a computer using the Command Prompt. It is particularly useful for automating system shutdowns, scheduling reboots, or remotely controlling other computers on a network.
If you want to use it to shut down your computer in 5 minutes, you can enter the following command:
SHUTDOWN /S /T 300
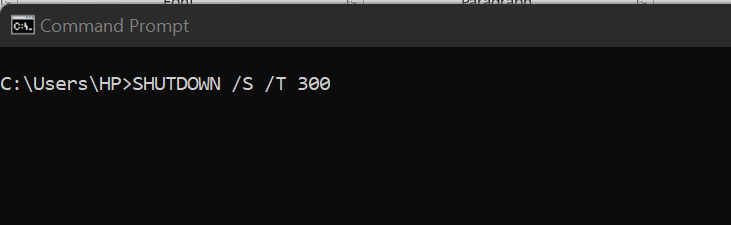
The above command instructs your computer to shut down in 5 minutes (300 seconds). To hibernate instead, replace S with H. To restart, replace S with R.
Summary of Basic CMD Commands
Here is a table summarizing the commonly used Command Prompt commands and their functions:
| Command | Description | Example |
|---|---|---|
| HELP | Lists commonly used commands and their functions | help |
| IPCONFIG | Displays network configuration and allows IP address management | ipconfig |
| PING | Tests network connection to a host by sending data packets | ping www.google.com |
| NETSTAT | Displays network statistics and active connections | netstat |
| TRACERT | Traces the path data takes to reach a destination host | tracert www.google.com |
| NSLOOKUP | Resolves domain names to IP addresses | nslookup www.google.com |
| CHKDSK | Scans and repairs disk errors and bad sectors | chkdsk |
| SYSTEMINFO | Displays detailed system information | systeminfo |
| SFC /SCANNOW | Scans and fixes corrupted Windows system files | sfc /scannow |
| TASKLIST | Lists all running processes on the system | tasklist |
| TASKKILL | Terminates specified processes | taskkill /IM skype.exe /F |
| FORMAT | Formats a disk and prepares it for use | format d: /fs:ntfs |
| CLS | Clears the Command Prompt screen | cls |
| TIME | Displays or sets the system time | time [new_time] |
| SHUTDOWN | Shuts down, restarts, or logs off the computer | shutdown /s /t 300 |
CMD Commands for Managing Files and Directories
You can also use the Command Prompt to interact with your files. It can come in handy whether you’re navigating through folders, managing files, or performing advanced system operations.
Let’s see how:
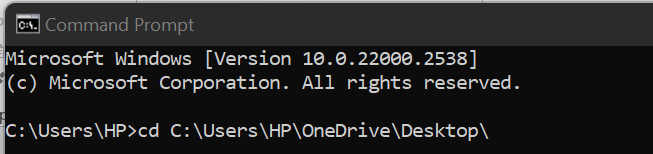
Command 1: CD
Short for Change Directory, the cd command is a fundamental tool for navigation within the Command Prompt. It allows you to move between directories.
By default, when you open the Command Prompt, it opens in the user’s home directory (e.g., C:\Users\YourUsername). This means any command you run will only affect files within this folder. To work with files in other locations, you must first navigate to the desired directory using the cd command.
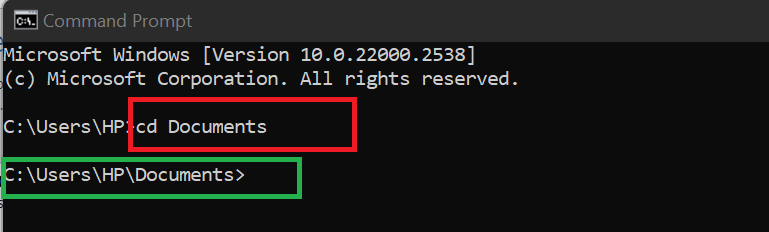
Let’s say you want to work in the Documents directory of your computer. Then simply type:
cd Documents
Once you hit Enter, you’ll notice you are now working within the Documents directory.
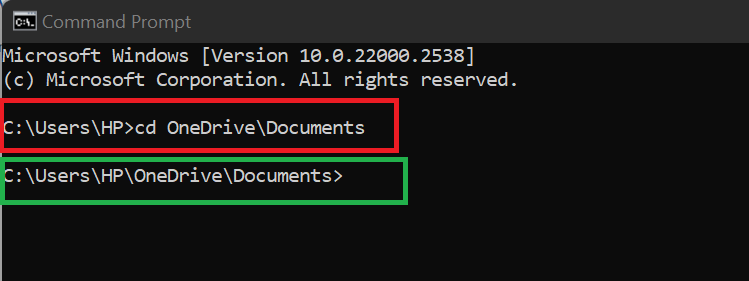
If your Documents folder is managed by OneDrive, the standard command may not work as expected. Instead, you may need to navigate to the Documents directory within the OneDrive folder using the following command:
cd C:\directory_path\Documents
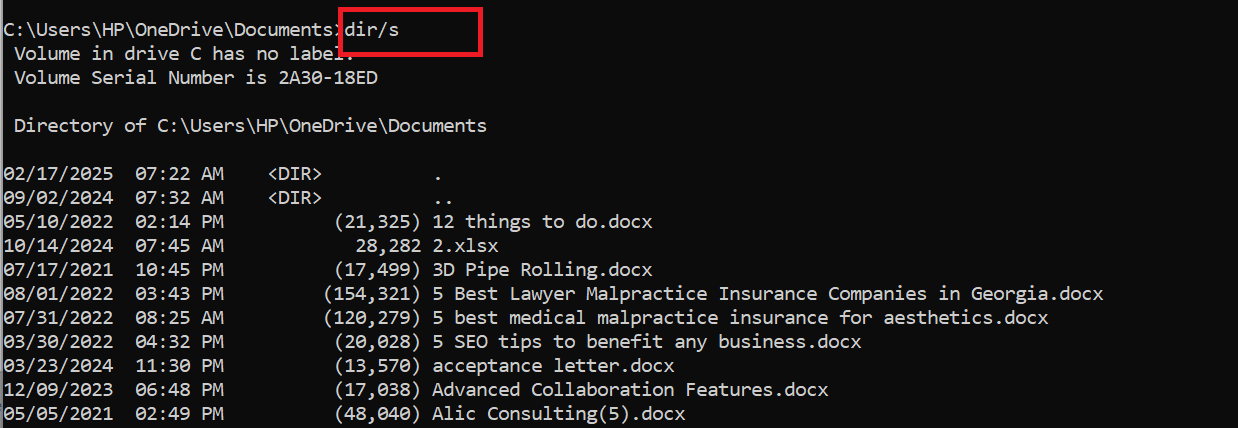
Command 2: DIR
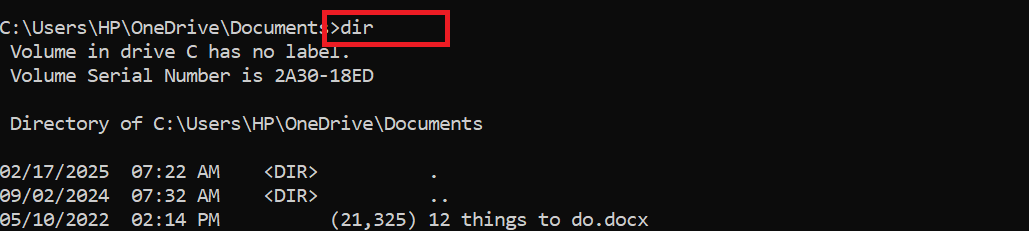
The dir command lists the contents of a directory. It can display files, subdirectories, and more, providing a bird’s-eye view of a directory’s contents.
By simply typing dir into the Command Prompt, you’ll see all the contents of your current directory.
Using the command dir /s will also include all subdirectories in the display.
Command 3: TREE
Looking through the results of the dir command might be tiring. To get a better idea of the files in the directory, you can use the tree command. This command displays a graphical representation of the directory structure, showing all folders inside the specified location.
For example, to view the structure of the Documents folder, use:
tree C:\directory_path\Documents
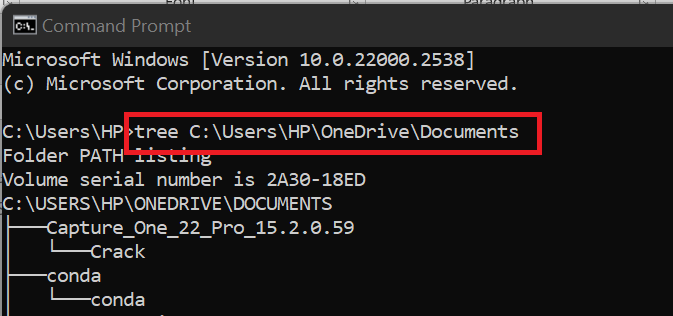
Replace directory_path with the actual path to the desired directory.
Command 4: COPY
The copy command copies files from one location to another. For instance, to copy a file named Test 1 from your desktop to your Documents folder, use the following command:
copy "C:\source_path" "C:\destination_path"
Command 5: XCOPY
The xcopy command is used to copy files and directories, including their contents, from one location to another. Unlike the basic copy command, xcopy can copy entire folders, making it ideal for backups and large file transfers.
For instance, to copy all files and subdirectories from the desktop to a backup location on the D: drive, use the following command:
xcopy "C:\directory_path" "D:\Backup" /E /I
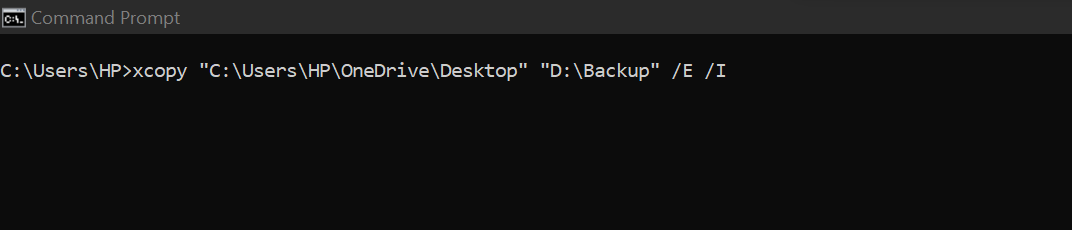
- /E: Copies all folders inside, even if they are empty.
- /I: If the destination doesn’t exist, xcopy assumes it’s a folder and creates it.
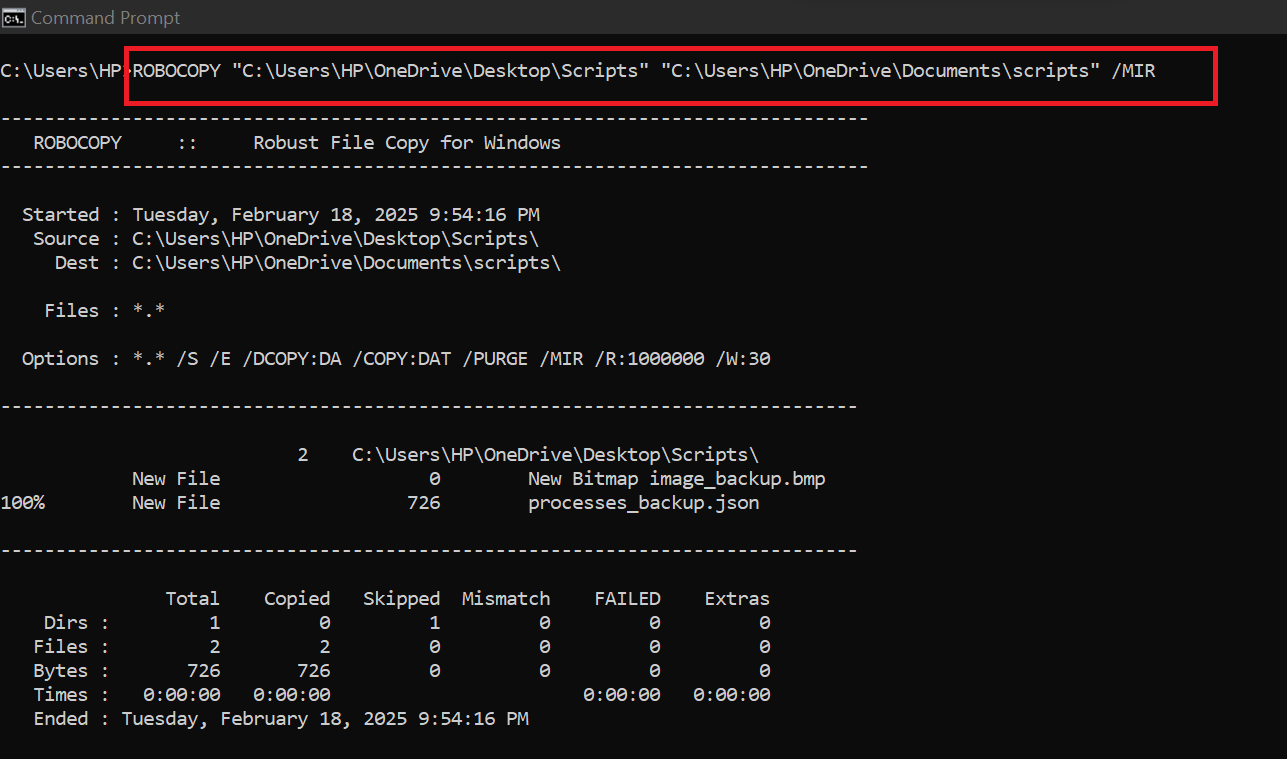
Command 6: ROBOCOPY
Robocopy, or Robust File Copy, is an advanced replication command. It offers better error handling, multi-threading, and the ability to resume interrupted transfers. It is useful for mirroring directories and copying large amounts of data efficiently.
For example, to mirror the contents of a source folder to a destination folder while ensuring an exact copy, use:
ROBOCOPY "C:\source_path" "D:\destination_path" /MIR
Command 7: TYPE
The type command is used to display the contents of a text file directly in the Command Prompt.
For example, to view the contents of a file named file2.txt located in the Desktop folder, use:
type "C:\file_path\file2.txt"
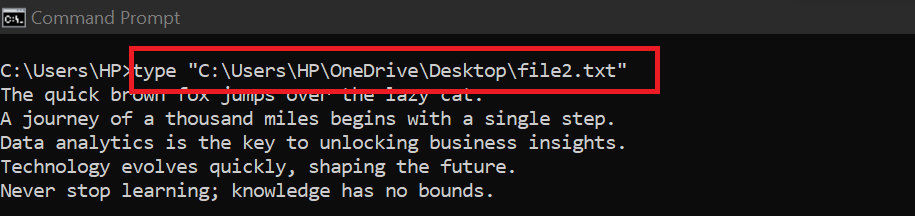
The type command in Windows is mainly used for text files like .txt, .log, and simple .csv files. If you use it for other file types such as .exe, .docx, .jpg, or .pdf, it will output unreadable characters.
Command 8: NOTEPAD
The notepad command opens the Notepad from the Command Prompt. This is useful for creating or modifying text files without opening an external text editor.
For example, to open or create a file named file3.txt in the Desktop folder, use:
notepad "C:\file_path\file3.txt"
The moment you hit Enter, Notepad will ask to confirm if you want to create a new file.
Command 9: DEL
The del command is an effective command for removing unwanted files directly from the command prompt.
For example, to delete a DOCX file named Test1 from your desktop, you would use the following command:
del "C:\file_path\Test1.docx"

Replace file_path with the actual path to the file.
Command 10: MOVE
The move command, as the name suggests, allows you to move files from one directory to another. For instance, to move a file named Test2.docx from the desktop to the Documents folder, type the following:
move "C:\source_path\Test2.docx" "C:\destination_path\Documents"

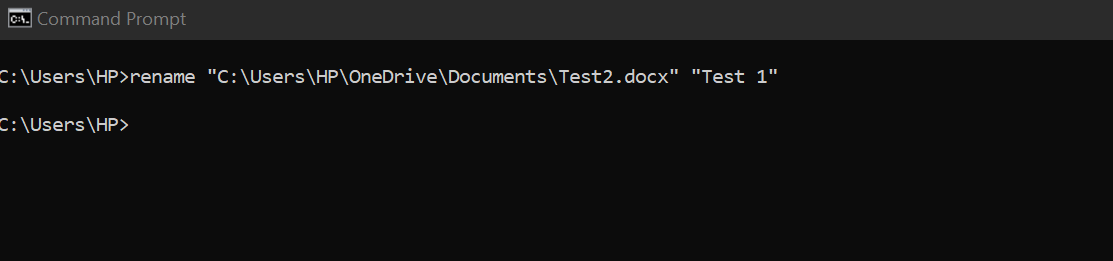
Command 11: RENAME
The rename command is a quick way to change file names directly from the Windows Command Prompt. For instance, to rename the Test2.docx file, you can type:
rename "C:\file_path\Test 2.docx" "Test 1"
Command 12: MKDIR
The mkdir command creates a new directory, offering an easy way to organize your files. Let’s say you want to create a new folder on your desktop called Testing. You could type:
mkdir C:\directory_path\Testing

Alternatively, if you are already in the directory where you want to create the folder, simply type mkdir followed by the name you want to assign to the folder, like this:
mkdir Testing

You should immediately see the folder appear in the specified location.

Command 13: RMDIR
The rmdir command deletes an existing directory, proving to be a convenient tool for directory removal.
To delete the new directory named Testing we’ve just created, type:
rmdir C:\directory_path\Testing

If you are already in the directory, you can also use:
rmdir Testing
The folder should immediately disappear from the directory.
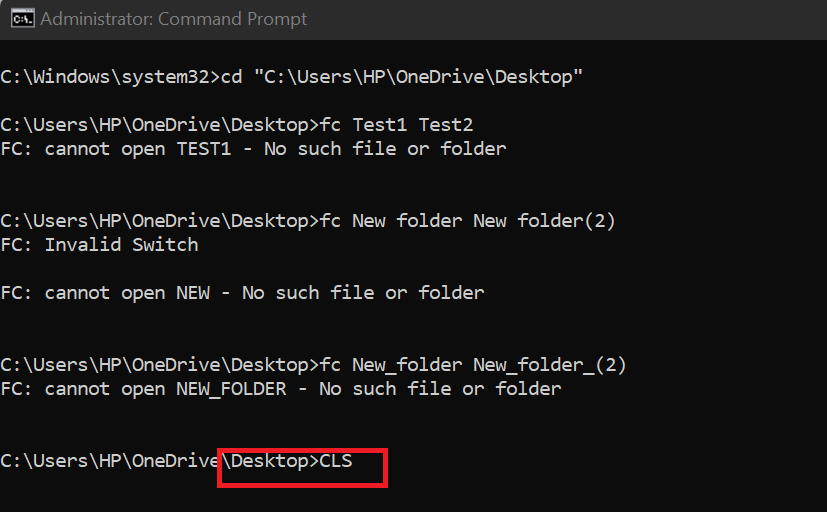
Command 14: FC
The fc (File Compare) command is used to compare the contents of two files and display the differences between them. It is helpful when checking for modifications, debugging scripts, or verifying file integrity.
A very interesting use case might be using it to compare log files to identify changes over time. For example, if you have two .txt files, file1 and file2, you can use the fc command to quickly spot any differences, as follows:
First, change the directory to the location of the two .txt files using the cd command:
cd C:\file_path
After that, type the following command:
FC file1.txt file2.txt
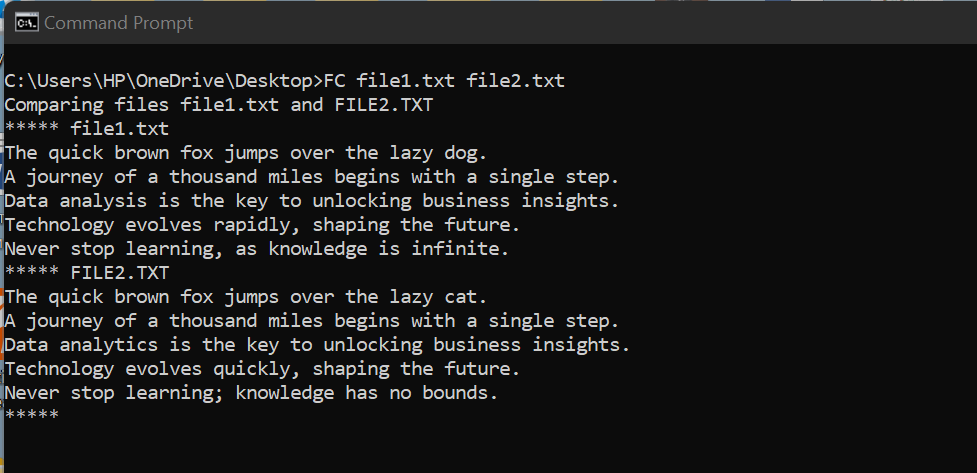
Additionally, the fc command does not handle large files very well, and it may produce inaccurate results if the files are in complex formats.
Command 15: ATTRIB
The attrib command allows you to change file or directory attributes, such as making files hidden or read-only.
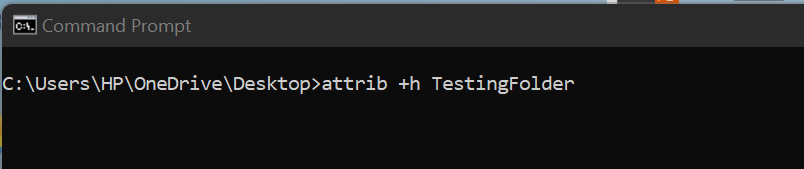
Let’s say you have some files you do not want people to see. You can hide them in a folder using this command. Let’s try it with a folder named TestingFolder. Here’s the command you need to run:
attrib +h TestingFolder
To remove the hidden attribute, use:
attrib -h TestingFolder

If you are not in the same directory as the file, you can enter the following command and replace file_path with the actual one:
attrib -h C:\file_path \TestingFolder
Summary of CMD Commands for Managing Files and Directories
| Command | Description | Example |
|---|---|---|
| CD | Changes the current directory | cd “directory_path” |
| DIR | Lists the contents of a directory | dir |
| TREE | Displays a graphical representation of the directory structure | tree “directory_path” |
| COPY | Copies files from one location to another | copy “source_path” “destination_path” |
| XCOPY | Copies files and directories, including subdirectories | xcopy “source_path” “destination_path” /E /I |
| ROBOCOPY | A robust file copy command with better error handling, multi-threading, and resumption features | robocopy “source_path” “destination_path” |
| TYPE | Displays the contents of a text file in the Command Prompt | type “file_path” |
| NOTEPAD | Opens a notepad in the Command Prompt | notepad “file_path” |
| DEL | Deletes a file permanently | del “file_path” |
| MOVE | Moves files from one location to another | move “source_path” “destination_path” |
| RENAME | Renames a file or directory | rename [old_name” “new_name” |
| MKDIR | Creates a new directory | mkdir “directory_name” |
| RMDIR | Deletes an existing directory | rmdir “directory_name” |
| FC | Compares the contents of two files and displays the differences | fc “file1″ file2” |
| ATTRIB | Changes file or directory attributes (e.g., hidden or read-only) | attrib +h file/folder_name |
Advanced Windows Command Prompt commands for Power Users
When you’re ready to dig deeper, you can try advanced command-line commands to manage your system better. Here’s a collection of some of the most powerful ones:
Command 1: NET USER
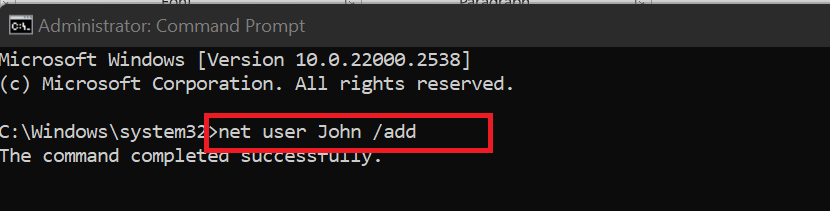
Net user is a versatile command, permitting you to add, remove, or modify user accounts on a Windows PC.
For example, to add a new user named John, you would type the following command:
net user John /add
Besides adding a new user, you can also use the command for the following actions:
- Delete an account: Use /delete to remove a user account. For example, this command removes the account named John:
net user John /delete

- Set a password: Enter a password after the username to set it. For example, this command creates an account for John with the password MyPassword123:
net user John MyPassword123 /add

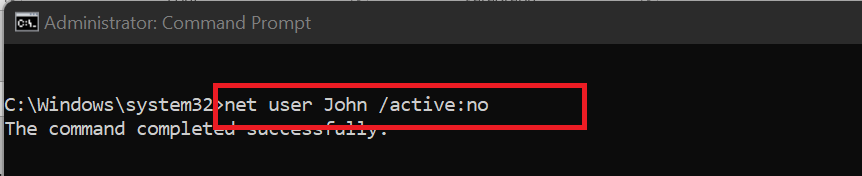
- Enable or disable an account: Use /active:yes to enable or /active:no to disable an account. For example, this command disables the “John” account, preventing login:
net user John /active:no
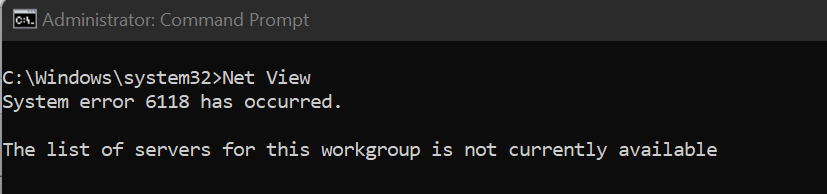
Command 2: NET VIEW
The net view command lets you see the list of resources, computers, or domains shared by a specific network.
Simply typing net view will provide a list of computers on your current network.
Command 3: NET SHARE
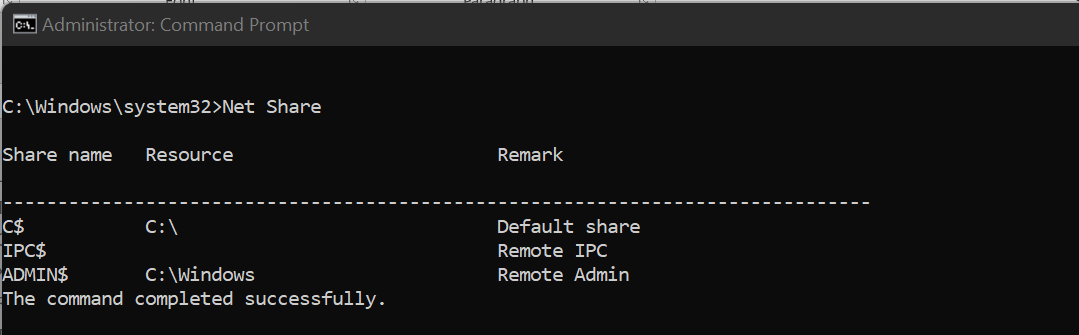
The net share command is used to manage shared resources on your computer, like shared directories or printers.
By typing net share, you can view all the resources currently shared from your PC.
Command 4: NET USE
The net use command allows you to connect to, disconnect from, and manage shared resources such as network drives and printers.
To connect a shared folder called SharedDocs from a computer named Comp01 and make it show up as drive Z:, type this command in the Command Prompt:
net use Z: \\Comp01\SharedDocs

Command 5: CIPHER
The cipher command helps you check whether a file or folder is encrypted or not encrypted on an NTFS file system (a type of storage system used by Windows). It also allows you to encrypt or decrypt files and folders as needed.
Just typing cipher (without any options) shows whether files and folders in the current location are encrypted or not.
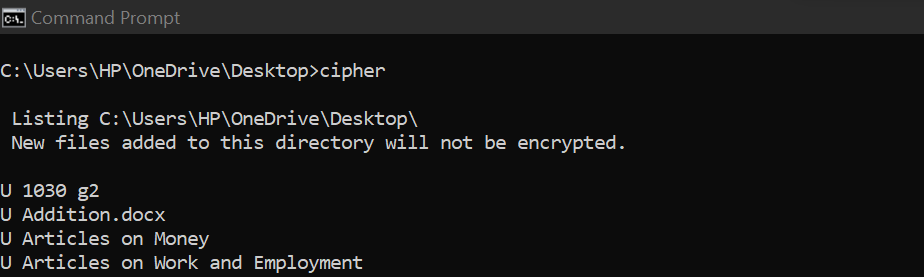
- U means Unencrypted
- E means Encrypted
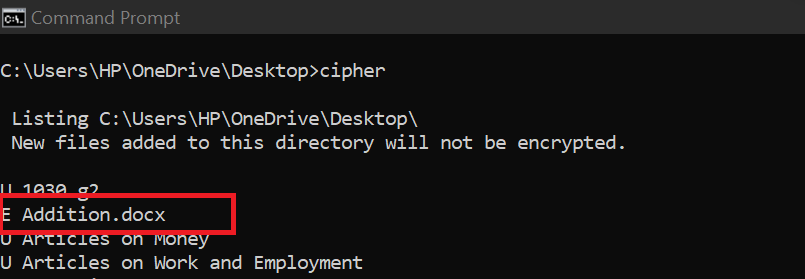
To encrypt a file in the current folder, use:
cipher /e file_name
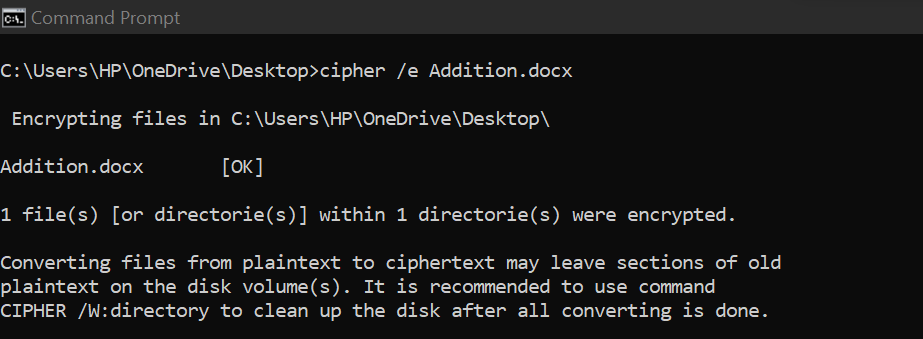
After running this command, the file’s status changes from U to E, meaning it is now encrypted.
Command 6: POWERCFG
Powercfg lets you manage the power settings in your system and diagnose any power problems.
Instead of going through Control Panel, you can easily get detailed insights about your laptop’s battery usage with this command:
powercfg /batteryreport

When you run this, it generates a detailed report about the battery usage, capacity history, and battery life estimates and saves it as an HTML file in your current directory.
Then you may pull up that battery report just by pasting the path into File Explorer.
You can also use the powercfg command to:
- Set a specific power plan: Switch between power plans to improve computer performance or battery life. For example, to select the High performance plan:
powercfg /setactive SCHEME_HIGHPERFORMANCE

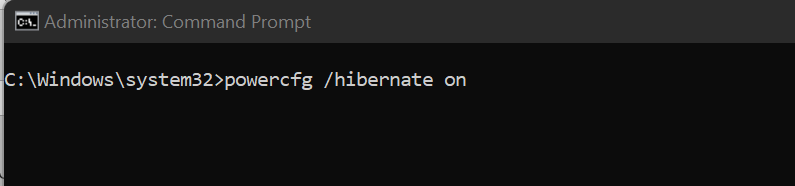
- Enable hibernation:
powercfg /hibernate on
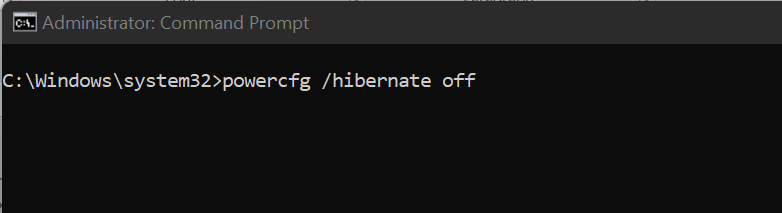
- Disable hibernation:
powercfg /hibernate off
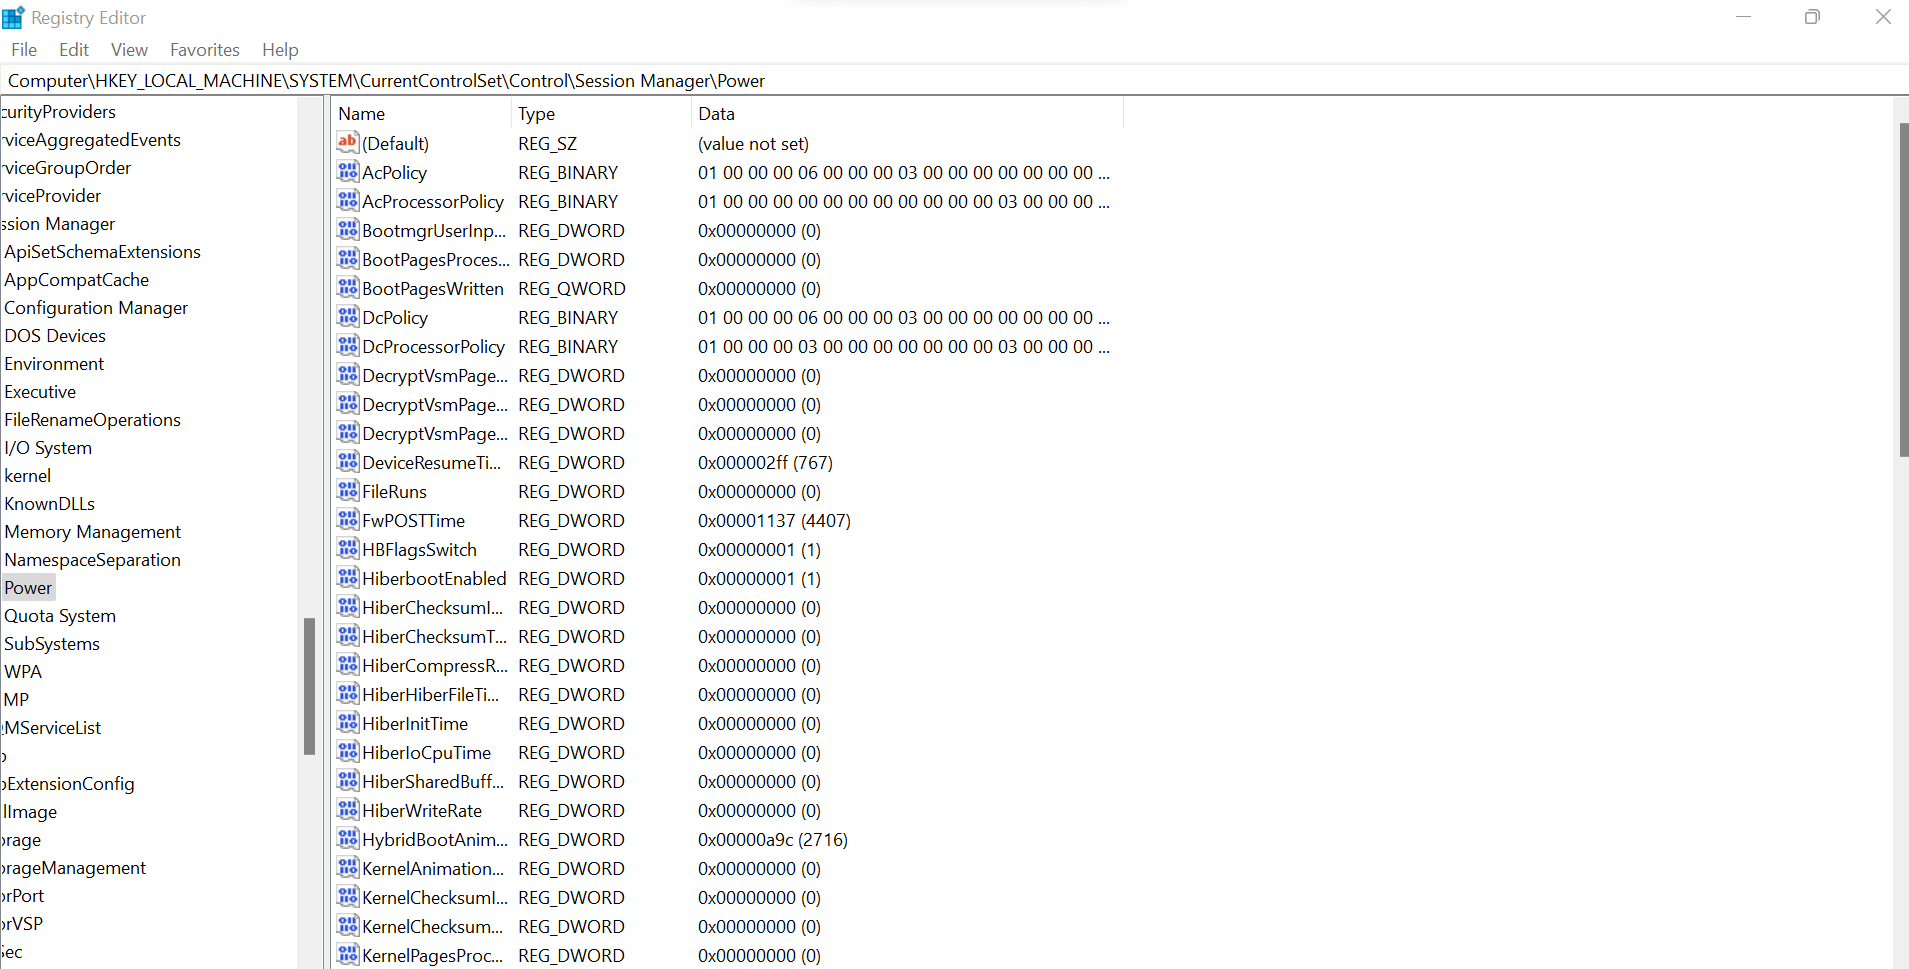
Command 7: REGEDIT
Regedit, or the Registry Editor, isn’t directly a CMD command, but it’s a powerful tool you can launch from the Command Prompt.
It is used to view and make changes to the Windows system registry, a hierarchical database that stores low-level settings for the operating system and applications running on it.
To open the Registry Editor from the Command Prompt, simply type regedit.

This will bring up a window, like you see in the image below.
Command 8: SCHTASKS
Schtasks is a helpful tool when you want to schedule CMD prompt commands at specified times.
To create a task that launches the Notepad application every day at 10 AM, type:
schtasks /create /sc daily /tn "MyNotepadTask" /tr "notepad.exe" /st 10:00

Command 9: GPUPDATE
Gpupdate is a nifty command that forces an immediate update of Group Policy. This can be useful for IT administrators who want to test changes to Group Policy Objects (GPOs) without waiting for the automatic refresh.
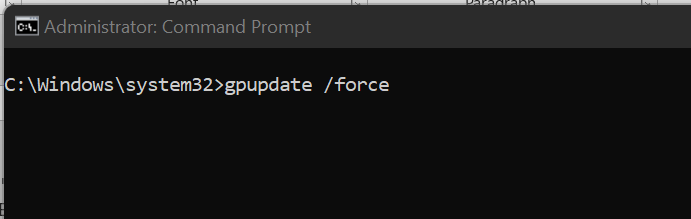
If you’ve made changes to a GPO and want them to take effect immediately, typing the following command into the Command Prompt will apply the changes right away:
gpupdate /force
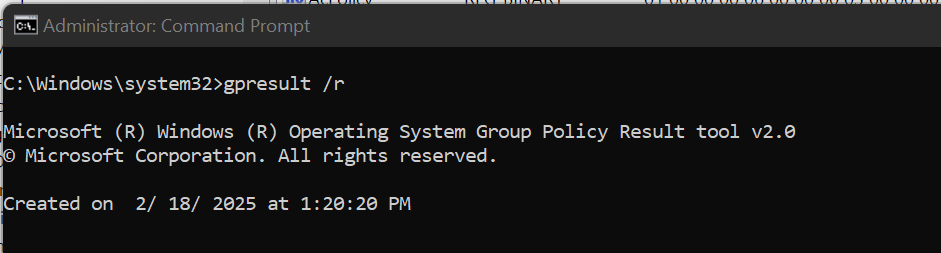
Command 10: GPRESULT
Gpresult is a command that outputs the Resultant Set of Policy (RSoP) information for a user or a computer. It’s a practical tool for IT administrators to troubleshoot Group Policy issues on a Windows system.
If you suspect a problem with Group Policy, the following command can display the applied GPOs, helping you identify potential issues:
gpresult /r
Command 11: WMIC
Wmic (Windows Management Instrumentation command-line utility) allows you to get specific details about your computer. It works like systeminfo but with more details.
With this command, you can view more advanced, customizable queries, such as retrieving a PC’s serial number, installed programs, or CPU details. WMIC is also useful for remote management and automation, such as scheduling automatic system reboots, making it ideal for IT administrators.
For example, if you are troubleshooting a problem with your GPU, you could type the following command to get the details of your GPU:
wmic path win32_videocontroller get name, adapterram, driverversion, pnpdeviceid

This will display the GPU name, memory size, driver version, and device ID, helping you identify potential issues.
wmic bios get serialnumber
Shows your computer’s serial number, useful for checking the warranty or identifying your PC.

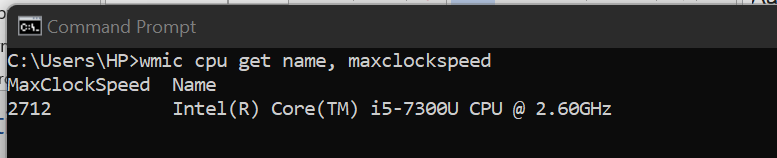
wmic cpu get name, maxclockspeed
Displays your CPU (processor) name and its maximum speed, which helps check performance.
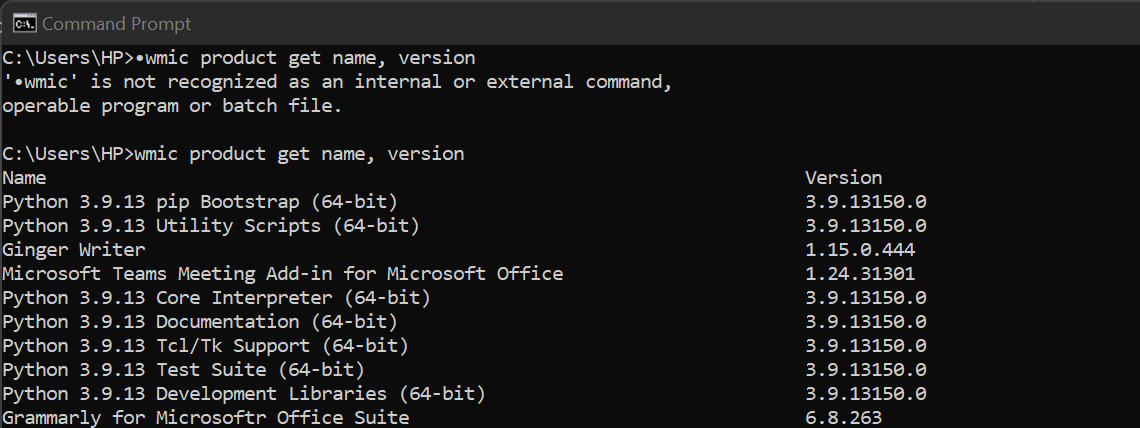
wmic product get name, version
Lists the software installed on your computer and their versions to help you track your programs.
Command 12: NETSH
Netsh (Network Shell) is a powerful tool for managing network configurations, including Wi-Fi, firewall, and IP settings.
For instance, you can use it to view all the Wi-Fi networks you connected to in the past by typing:
netsh wlan show profiles

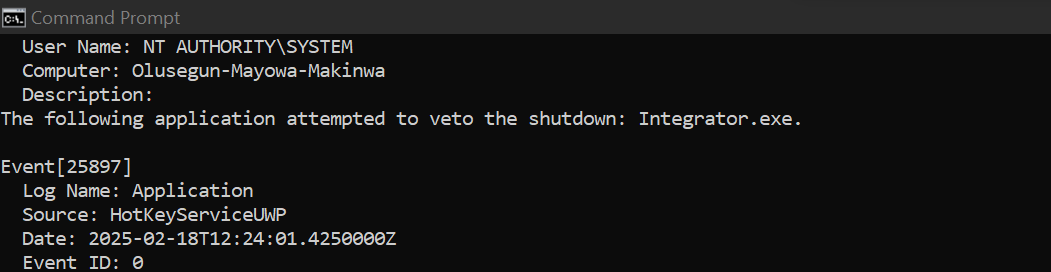
Command 13: WEVTUTIL
Wevtutil (Windows Event Utility) allows users to manage and query Windows event logs. Event logs are records of significant activities that happen on a computer, such as system errors, warnings, application crashes, or security events.
These logs are created by the operating system or applications and can help track system performance, troubleshoot issues, and ensure security.
Let’s say your computer is frequently crashing or freezing. By checking the event logs using wevtutil, you can see if there are any recurring error messages or warnings that could point to the cause, such as a failing hardware component or a software conflict. This information can help a technician or you pinpoint and fix the issue.
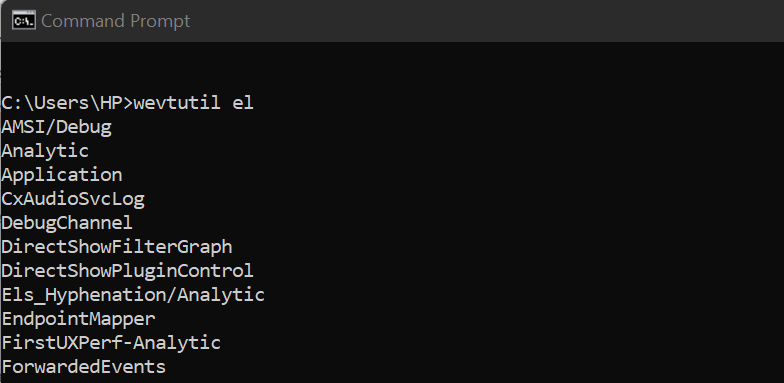
To use the command to list all available event logs, type:
wevtutil el
After the list appears, choose a log name you want to examine. For example, to check the Application log, use the following command:
wevtutil qe "Application" /f:text
You will get a long text showing you the content of the log.

Command 14: ICACLS
The icacls command is used in Windows operating systems to manage and modify file and folder permissions. It allows you to set, change, or view the permissions (access control lists, or ACLs) of files and directories. Permissions include things like who can read, write, modify, or execute a file.
If you’re an administrator on a system and want to grant a user full control of a folder, use this command:
icacls "C:\MyFolder" /grant UserName:F
Command 15: BCDEDIT
Bcdedit (Boot Configuration Data Editor) modifies boot settings, making it essential for troubleshooting boot issues and configuring multi-boot setups.
Let’s say you are troubleshooting and you need to restart Windows in Safe Mode. You can use this command:
bcdedit /set {current} safeboot minimal
When Windows reboots, it will load only essential drivers and services.
Summary of the Advanced Command Prompt Commands
Here’s a summary table for all of the advanced Command Prompt commands we covered:
| Command | Description | Example |
|---|---|---|
| NET USER | Manages user accounts (add, delete, modify, enable/disable) | net user John /add |
| NET VIEW | Lists computers or shared resources on the network | net view |
| NET SHARE | Manages shared resources like folders or printers | net share |
| NET USE | Connects to or disconnects from shared network resources | net use Z: \\Comp01\SharedDocs |
| CIPHER | Checks encryption status of a file or folder | Cipher [file_path] |
| POWERCFG | Manages power settings and battery reports | powercfg /batteryreport |
| REGEDIT | Accesses the system registry editor | regedit |
| SCHTASKS | Schedules tasks to run at specified times | schtasks /create /sc daily /tn “MyNotepadTask” /tr “notepad.exe” /st 10:00 |
| GPUPDATE | Forces a Group Policy update | gpupdate /force |
| GPRESULT | Shows Resultant Set of Policy information | gpresult /r |
| WMIC | Retrieves system and hardware details, allows automation | wmic path win32_videocontroller get name, adapterram, driverversion, pnpdeviceid |
| NETSH | Configures network settings and manages IP, Wi-Fi, and firewall | netsh wlan show profiles |
| WEVTUTIL | Manages and queries Windows event logs | wevtutil el |
| ICACLS | Modifies file/folder permissions and access control lists | icacls “C:\MyFolder” /grant UserName:F |
| BCDEDIT | Modifies boot settings, useful for troubleshooting boot issues | bcdedit /set {current} safeboot minimal |
Take the Windows Command Prompt to the Next Level
If you tried any of these commands on our Command Prompt cheat sheet, you already realize how immensely useful CMD is for Windows. With these commands, you can perform tasks faster, fix problems, and have more control over your computer.
While these commands will definitely make things easier, it is important to mention that you should be careful. Some commands, especially those that make changes to the Windows registry, can be risky. If used incorrectly, they may cause serious problems with your system, so always ensure you understand what a command can do before running it.
What’s your personal experience using CMD commands? Share your thoughts in the comments!