
- What Is PowerShell?
- How to Download Windows PowerShell
- How to Configure PowerShell
- Core PowerShell Commands
- Working with Files and Directories
- System Administration Commands
- Automation and Scripting
- Data Handling
- Working with Remote Systems
- Less Common but Powerful PowerShell Commands
- Comprehensive PowerShell Command Cheat Sheet
- Tips for Writing and Debugging PowerShell Scripts
- Common Scripting Mistakes in PowerShell Commands and How to Avoid Them
- Sample Scripts to Try Out
- Conclusion
- FAQ
PowerShell is an invaluable resource for both beginners and experts. It lets you automate tasks and interact with your computer in ways that might seem impossible with the regular interface. However, some users find PowerShell intimidating because it looks like coding, which can be confusing if you’re not familiar with programming. Not anymore!
With this guide, you can learn to use PowerShell commands without having so much knowledge of coding. This guide is designed for those who want to skip the long, technical documentation and get straight to the essentials.
Whether you’re new to PowerShell or looking to streamline your tasks, this guide covers the basics, introduces helpful commands, and highlights powerful automation tools that will make your daily tasks easier. For developers and advanced users, it also offers insights into more complex automation features that can save time and increase productivity.
What Is PowerShell?
PowerShell is a command-line tool and scripting language created by Microsoft to help users manage and automate tasks on their computers.
The tool includes a set of built-in commands called PowerShell cmdlets that allow users to perform specific tasks, such as managing files, configuring system settings, and interacting with applications. It allows users to execute scripts or instructions that handle repetitive operations, monitor system performance, and troubleshoot issues efficiently.
In addition to Windows, PowerShell also runs on Linux and macOS because it is now an open-source platform built on .NET Core. This cross-platform compatibility means you can leverage PowerShell’s automation capabilities across different operating systems.
PowerShell is different because it works with objects instead of just text. Objects are like data packages that contain useful details and built-in actions. This makes it easier to pass information between commands, filter results, and automate tasks without extra work.
How to Download Windows PowerShell
PowerShell comes pre-installed on Windows 10 and Windows 11, so if you’re using one of these versions, you likely don’t need to install it separately. However, if you want the latest features, you can update to the newest PowerShell version.
For users on older Windows versions, like Windows 7 or 8, downloading and installing PowerShell manually is necessary. Here is how to do it with WinGet:
- Search for Command Prompt and click Run as administrator.
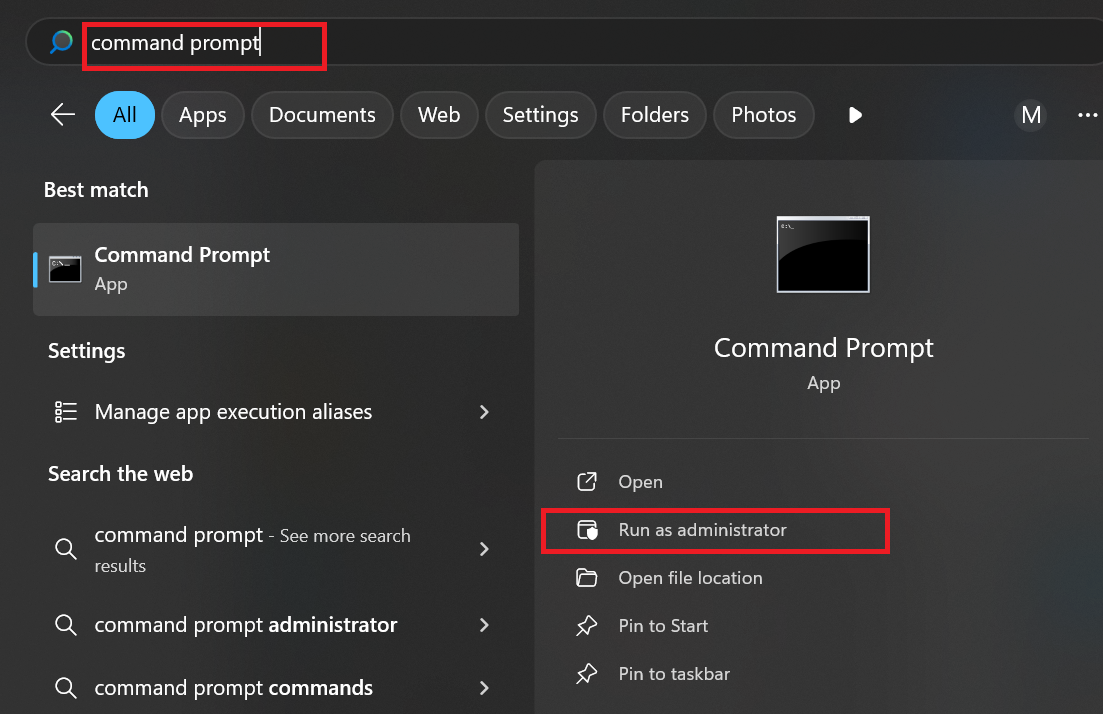
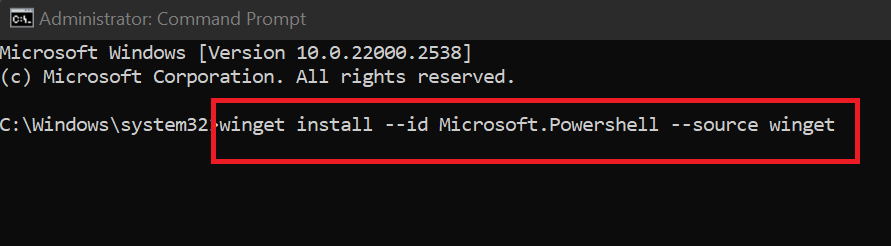
- Run the following WinGet command:
winget install --id Microsoft.PowerShell --source winget
- If prompted, accept the installation agreement. WinGet will download and install PowerShell automatically.
How to Configure PowerShell
After installing PowerShell, you need to configure it properly to ensure it is secure and to improve its performance. Below are the key steps to get started:
Set your preferred execution policy
By default, PowerShell enforces restrictions on running scripts. While this is good for security reasons, you need to make some changes before you can start running scripts.
First, you need to check your current execution policy. Open PowerShell, and run the following command:
Get-ExecutionPolicy
If the command executes successfully, it will return one of the following values:
- Restricted: No scripts are allowed to run (default on Windows 11).
- RemoteSigned: Locally created scripts can run, but downloaded scripts must be signed.
- Unrestricted: All scripts can run, but you will get a warning for downloaded scripts.
- AllSigned: Only scripts signed by a trusted publisher can run.
- Bypass: No restrictions; all scripts run without warnings (not recommended for security).
If needed, you can change the policy by running this command:
Set-ExecutionPolicy RemoteSigned
After making this change, PowerShell will allow your trusted scripts to run while maintaining protection against unverified sources.
Updating PowerShell
- In Windows Search, type Command Prompt and click Run as administrator.
- Next, enter the following command and hit
Enter:
winget upgrade --id Microsoft.PowerShell --source winget
- Windows will check for available updates and prompt you to continue. Type Y and press
Enterif required.
Should you use PowerShell ISE or Terminal?
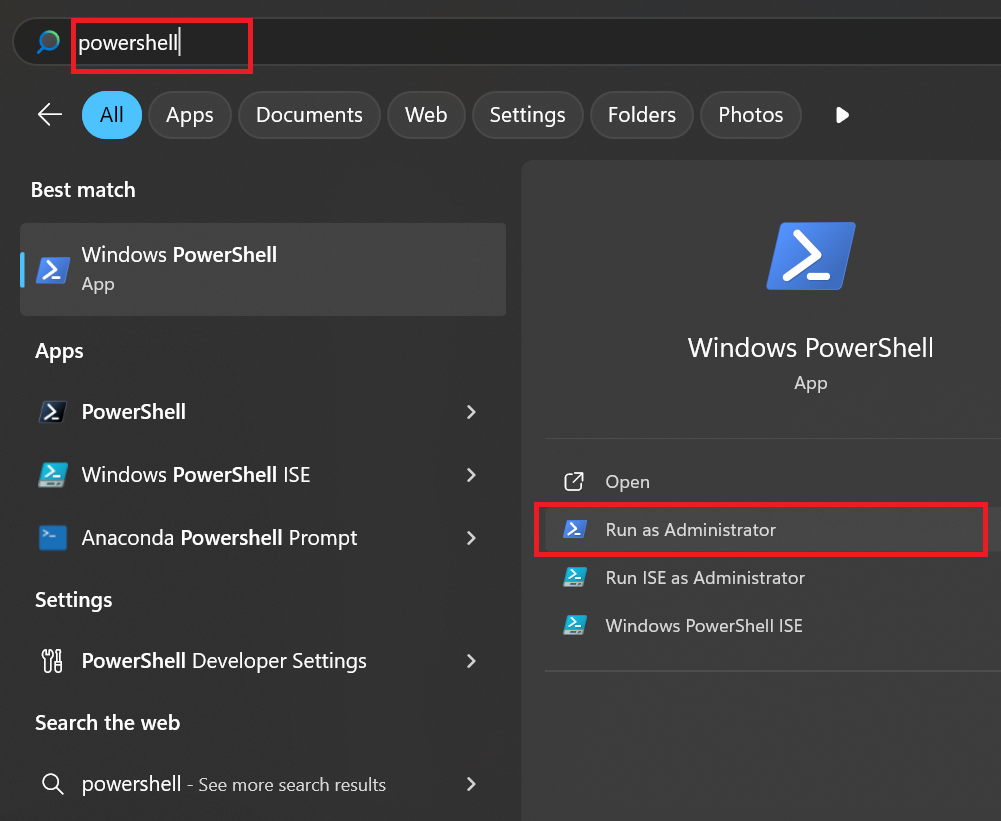
When you search for Windows PowerShell, you will notice there are different options; click any of them to start PowerShell.
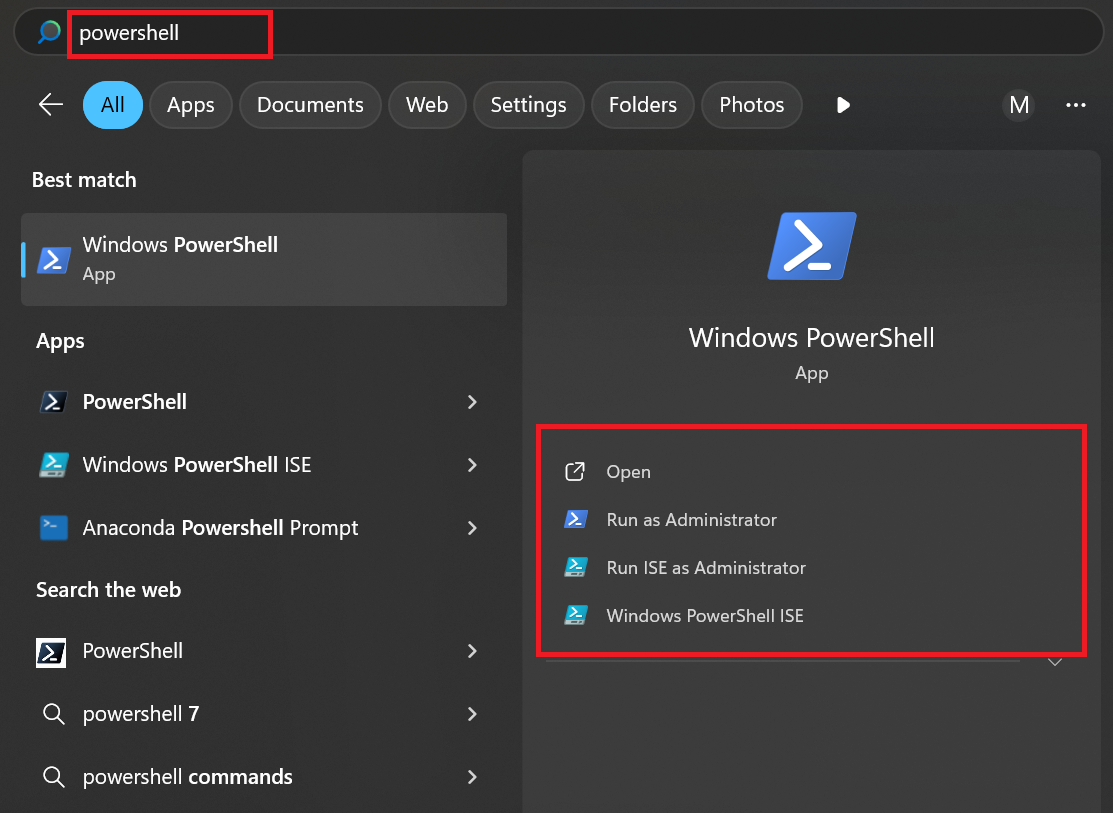
Each of these options serves a different purpose. Here’s how they differ:
- Open: This option launches PowerShell in normal user mode with standard permissions. It allows you to run scripts, manage system settings, and interact with Windows features, but with limited privileges.
- Run as Administrator: With this option, you can open PowerShell with administrator privileges. This means you can run some Windows PowerShell commands like modifying system policies or installing software that won’t work in normal mode.
- Run ISE as Administrator: This is a graphical user interface (GUI) version of PowerShell. It includes features like syntax highlighting, tab completion, and debugging tools, making it easier to write and test scripts. Like with the regular PowerShell, it allows running scripts that require administrative rights.
- Windows PowerShell ISE: This is the same ISE (Integrated Scripting Environment) but without elevated privileges.
Core PowerShell Commands
We start with core PowerShell commands, which are the basic commands for controlling your computer and managing tasks. They’re simple, built-in instructions that allow you to start working with PowerShell easily and effectively.
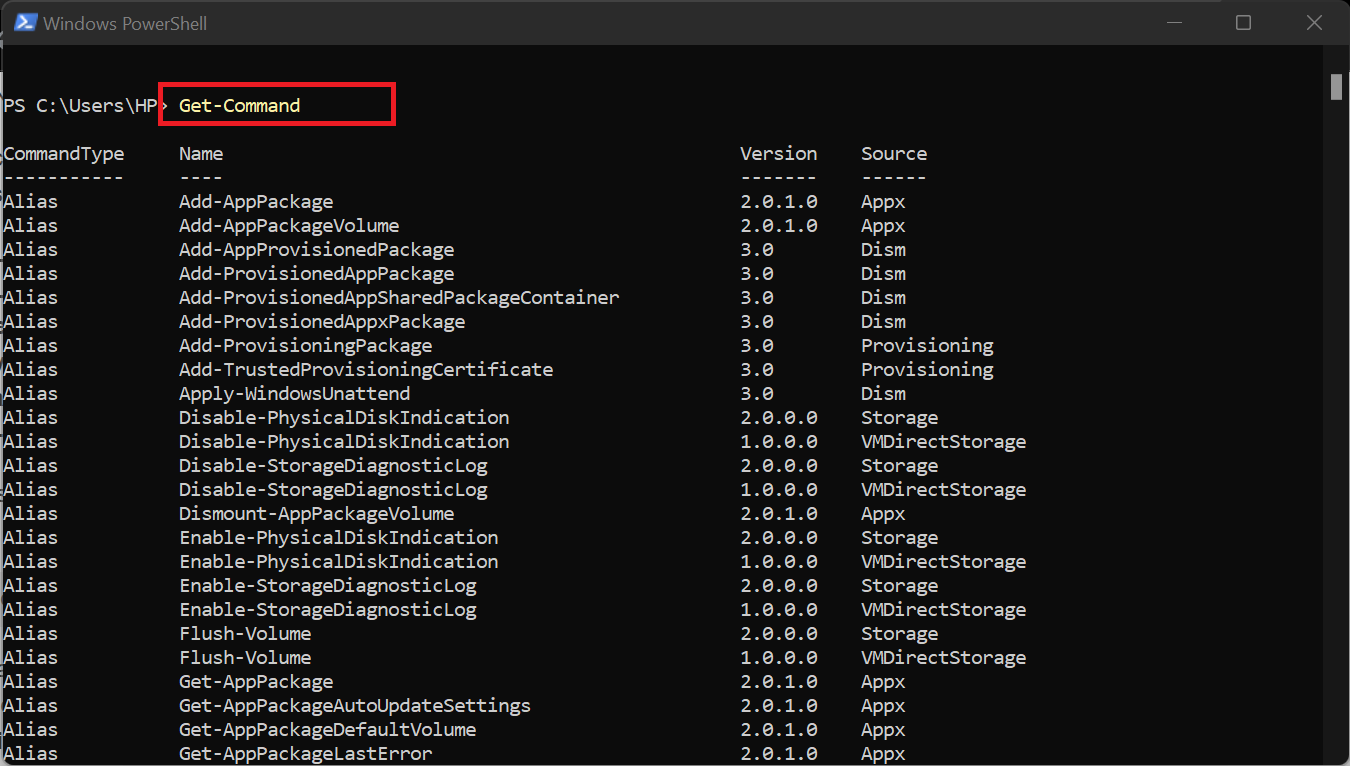
Get-Command
With this, you can get a list of all available Windows PowerShell commands. It is useful when searching for a specific command or discovering available functions, cmdlets, or aliases. For example, inputting Get-Command -Module ActiveDirectory will list all commands available in the ActiveDirectory module.
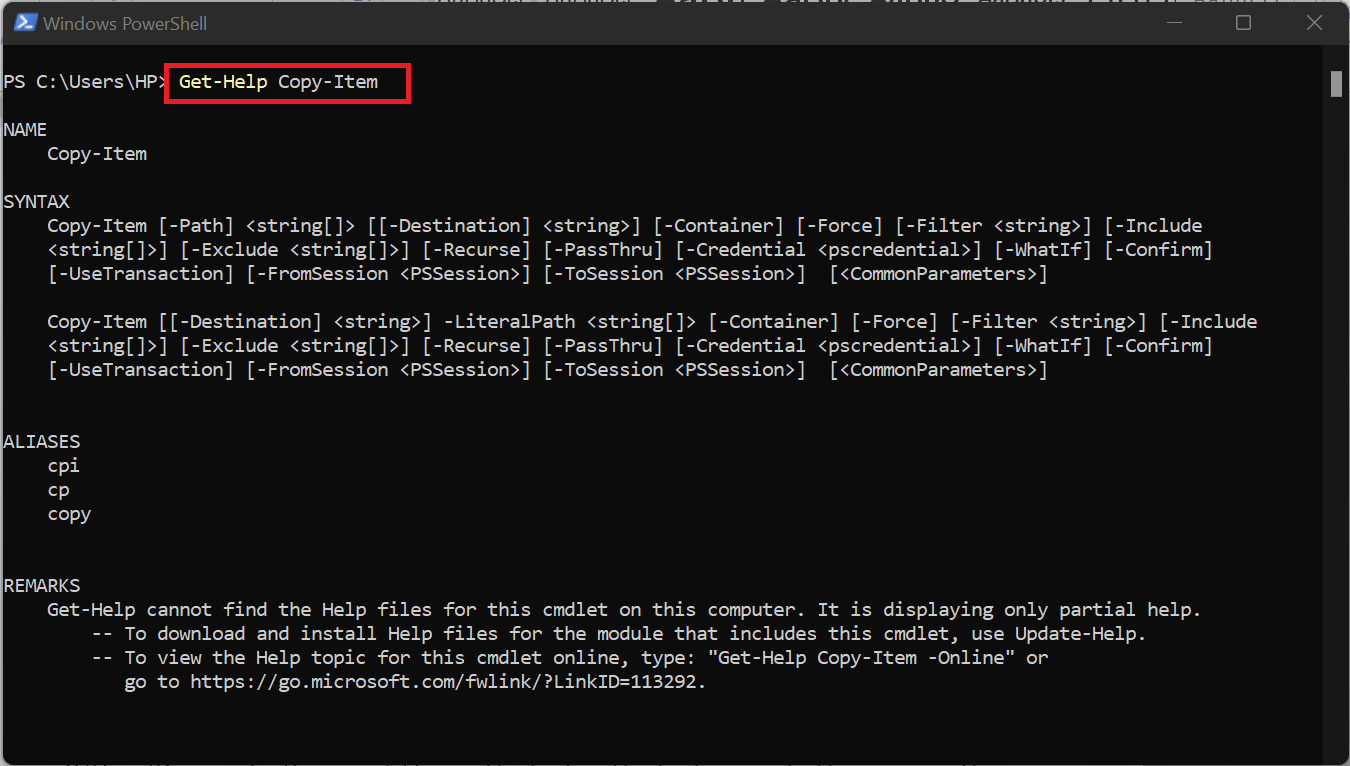
Get-Help
The Get-Help command provides information about other PowerShell commands to help you understand their usage. It can also come in handy for professionals during troubleshooting as you can use it to get quick documentation on commands.
For example, let’s say you need to know how the Copy-Item command works. You can type Get-Help Copy-Item to see a detailed explanation of its parameters and examples of how to use it.
Get-Item
The Get-Item command retrieves information about a specific file, folder, or other item in PowerShell. It is useful when you need to inspect the properties of an object before performing actions on it.
Try the following code (remember to replace directory_path with the actual path you want to check):
Get-Item "C:\directory_path"
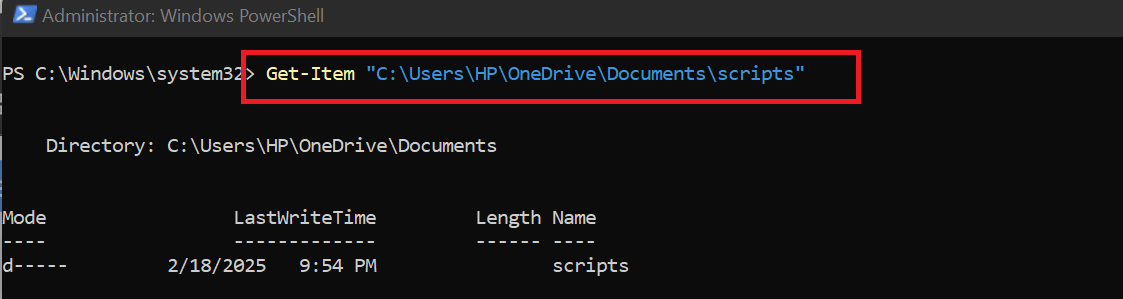
- The Mode column shows d—–, where d indicates it is a directory (folder).
- LastWriteTime tells you when the folder was last modified.
- The Name column lists the folder name (scripts).
- There is no Length value because folders do not have a file size like individual files do.
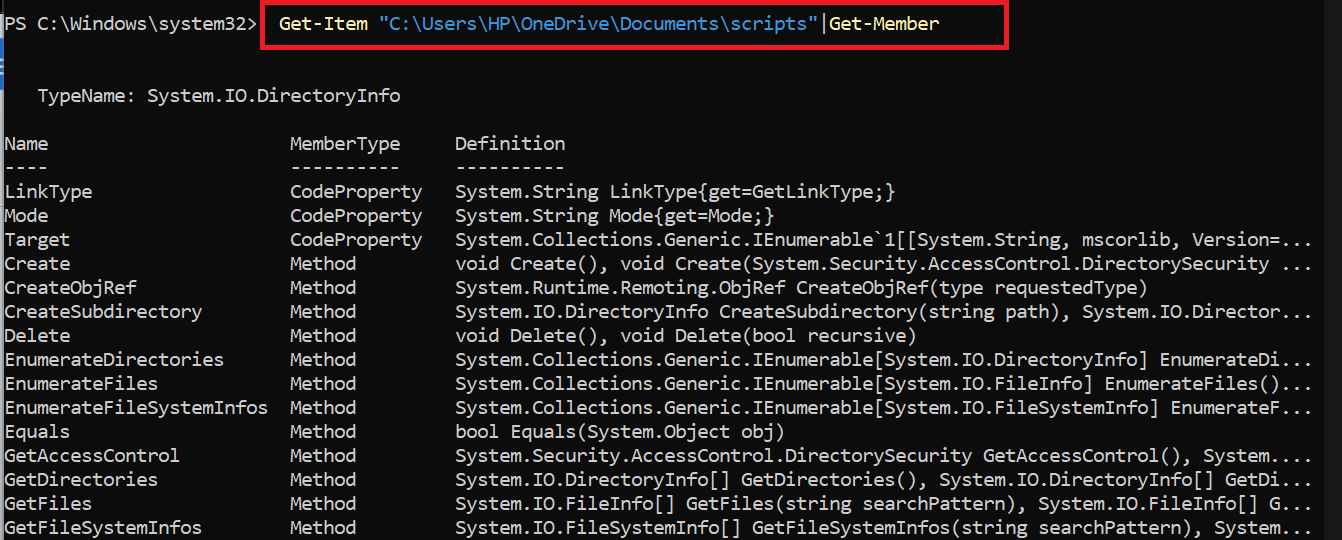
Get-Member
The Get-Member command displays the properties and methods of an object in PowerShell. It is particularly useful when working with objects whose structure or available actions are unknown.
Unlike Get-Item, this command does not retrieve objects but instead analyzes them, displaying their properties and methods.
Let’s use the command on the same folder to see the difference (again, replace directory_path with the actual path):
Get-Item "C:\directory_path" | Get-Member
Now, you can access the attributes of the folder, like its Name, and available methods for manipulation.
Working with Files and Directories
Managing files and directories is another fundamental part of using PowerShell. With built-in commands, you can create, modify, move, and delete files or folders efficiently. These commands help automate file management tasks, making it easier to organize and control your system’s data.
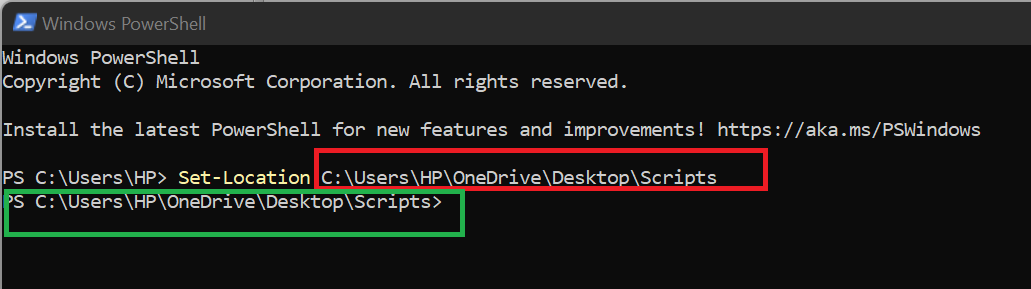
Set-Location (cd)
The Set-Location command, also known as cd, is used to change the current directory in PowerShell.
By default, when you run PowerShell commands, they run in the current directory (usually the user’s home directory, such as C:\Users\Username on Windows), meaning any file operations or script executions will be relative to this location.
For example, run the following command (replace C:\Users\… with the desired directory path):
Set-Location C:\Users\HP\OneDrive\Desktop\Scripts
Windows PowerShell will change the directory you are working in, so you can start working with the files inside it. Notice how the path (in green) changes after the command.
Get-ChildItem
The Get-ChildItem command lists the contents of a directory, including files and subdirectories. Assuming you want to see all files in your desktop folder, you can run the following command (remember to replace C:\Users\… with the desired path):
Get-ChildItem C:\Users\HP\OneDrive\Desktop
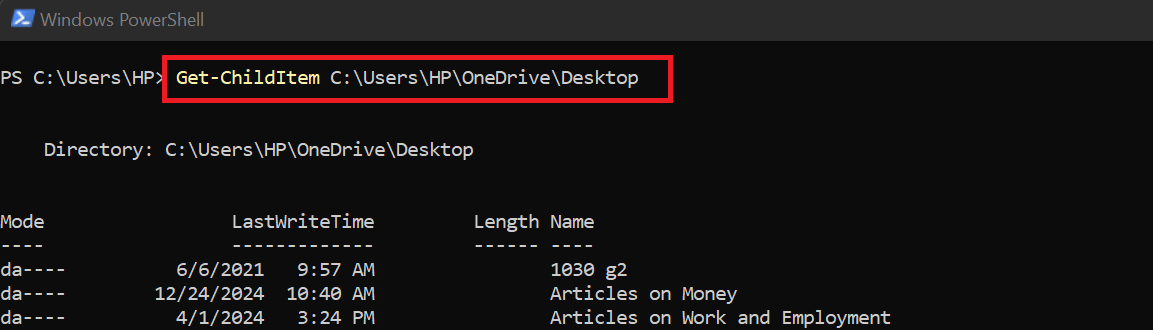
This is useful for quickly checking file structures or identifying missing files in a directory.
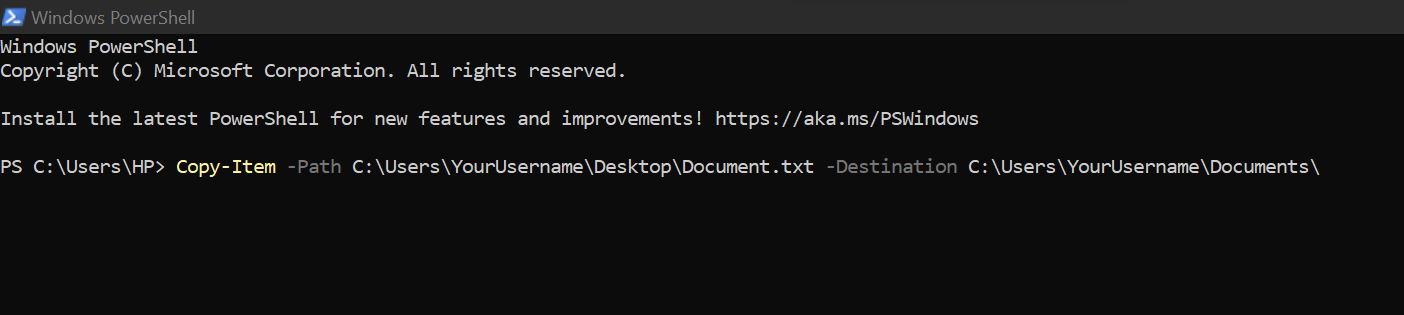
Copy-Item (cp)
The Copy-Item command allows you to copy files and directories from one location to another.
Let’s say you need to move one of the documents from the desktop to Documents. You can use the following command (replace the source and destination paths with the desired ones):
Copy-Item -Path C:\Users\YourUsername\Desktop\Document.txt -Destination C:\Users\YourUsername\Documents\
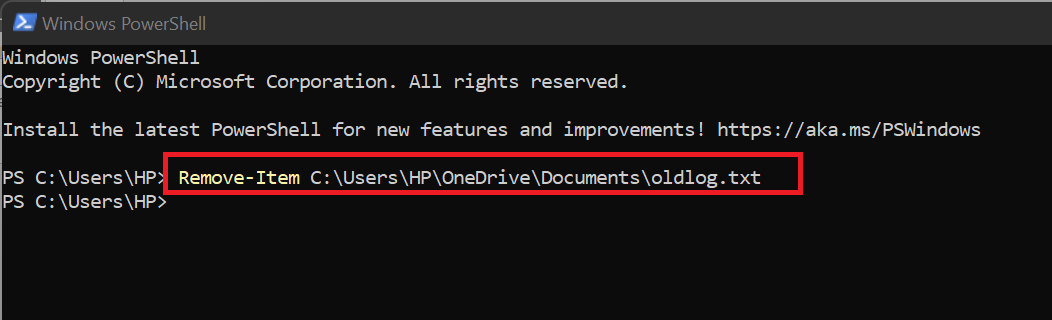
Remove-Item (rm)
Like the name suggests, the Remove-Item command deletes files and folders. System administrators often use this to clean up outdated or unnecessary files.
Let’s assume you have an old log file named oldlog.txt in the Documents folder. You can easily use the following command (remember to replace C:\Users\… with the desired path to the file):
Remove-Item C:\Users\HP\OneDrive\Documents\oldlog.txt
Get-Content
The Get-Content command retrieves the content of a specified file for reading logs, configuration files, or scripts. It can display the file contents in the console, return an array of strings, or process the content line by line. This command supports filtering and selecting specific lines, making it ideal for handling large files efficiently.
Imagine you were going through your files with the Get-ChildItem command. Then, if you spot a file and you are not sure what it is, you can use the following command to see what’s in the file (replace C:\Users\… with the desired path to the file):
Get-Content -Path "C:\Users\HP\OneDrive\Documents\oldlog.txt"
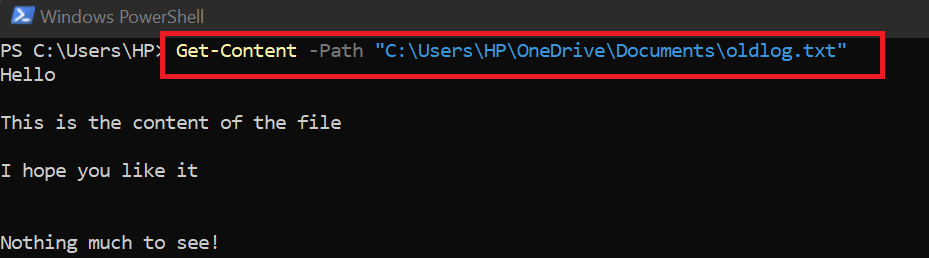
As you can see, the command will read the contents and display them in the console. Suppose you only want to read a few lines. You can limit the results by using the arguments First or Last:
Get-Content -Path "C:\Users\HP\OneDrive\Documents\oldlog.txt" -First 2
This will show you the first 2 lines (replace C:\Users\… with the desired path to the file and the number with the desired number of lines).

Get-Content -Path "C:\Users\HP\OneDrive\Documents\oldlog.txt" -Last 2
This will show you the last 2 lines:

Add-Content
Add-Content appends content to a file without overwriting existing data. It is useful for logging, updating configuration files, or adding data to reports.
Let’s use this command to add a new line of text to our file:
Add-Content -Path " C:\Users\HP\OneDrive\Documents\oldlog.txt" -Value "Here is the new line we added."

To see if the line is added, we can use Get-Content and the –Last 2 argument we covered above:

Set-Content
Set-Content writes or replaces content in a file. It is useful for modifying configuration files or creating logs. Unlike Add-Content, which appends data, Set-Content removes everything in the file and replaces it with your new entry.
Let’s say the contents of the oldlog.txt file have become outdated. We can change the contents by running the following command:
Set-Content -Path "C:\Users\HP\OneDrive\Documents\oldlog.txt" -Value "This is the new log entry containing new details. We updated it together, remember?"

Now, if we check the content of the file (using Get-Content), it only has the new text we added.

Rename-Item
Rename-Item renames files or directories. It is beneficial for bulk renaming scripts or restructuring directories. For example, let’s rename our log file as Newlog.txt:
Rename-Item -Path "C:\Users\HP\OneDrive\Documents\oldlog.txt" -NewName "Newlog.txt"

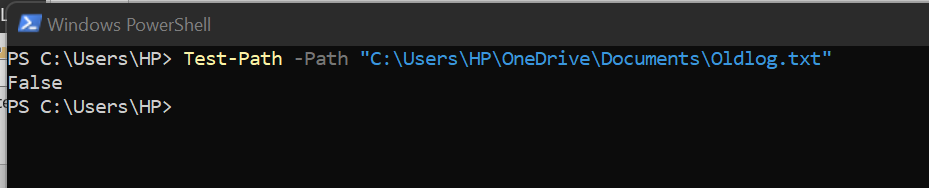
Test-Path
Test-Path verifies whether a file or directory exists. It returns True if the path exists and False otherwise, making it useful for conditional execution in scripts.
Let’s use the command to check if Oldlog.txt still exists:
Test-Path -Path "C:\Users\HP\OneDrive\Documents\Oldlog.txt"
System Administration Commands
System administration commands in PowerShell help in monitoring system performance, troubleshooting issues, and automating administrative tasks.
Most system administration PowerShell commands need admin privileges because they change system settings, processes, and services, which can impact stability and security. To run them, open PowerShell as an administrator.
To be sure PowerShell is running with admin privileges, the window should read Administrator: Windows PowerShell.
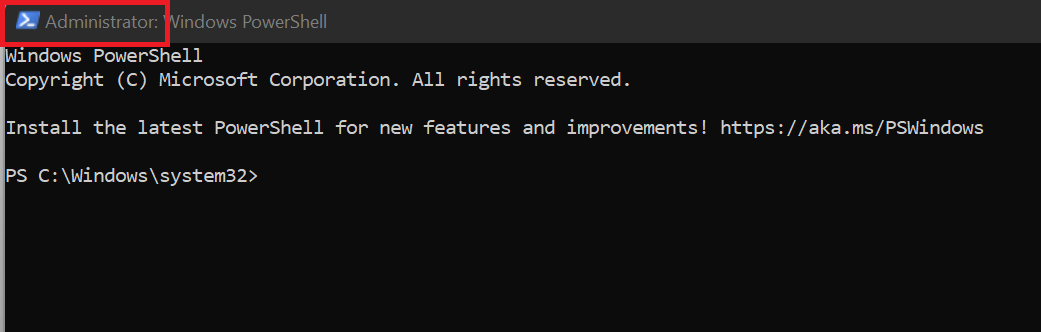
Now that you have opened PowerShell as an admin, let’s run some commands.
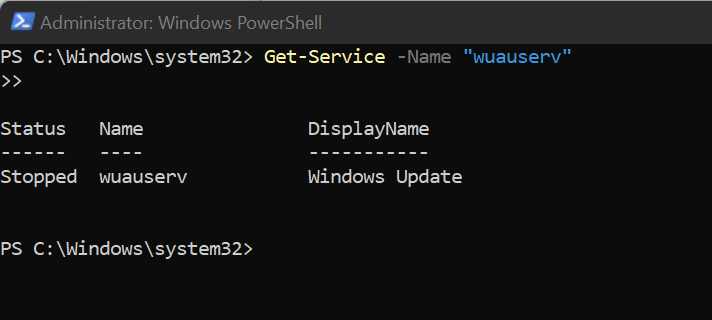
Get-Service
Get-Service lists installed services and their statuses. It is useful for monitoring system performance and troubleshooting. For instance, if Windows Update is not working, you can check it using the following command:
Get-Service -Name "wuauserv"
Start-Service / Stop-Service
These Windows PowerShell commands start and stop system services, which are essential for maintenance and troubleshooting tasks.
Let’s use the same Windows Update as an example. One of the methods to troubleshoot Windows Update is to stop and then start the service again. You can do that using:
Stop-Service -Name "wuauserv"
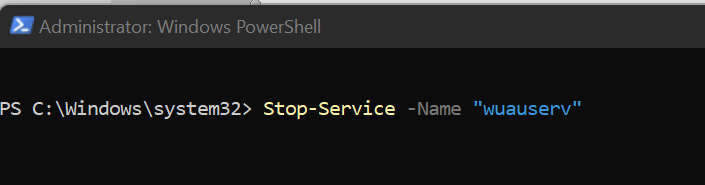
Start-Service -Name "wuauserv"
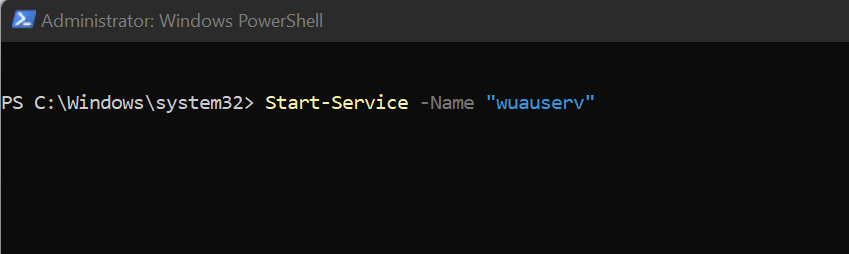
The first command stops the Windows Update service, and the second command starts it again. This can help resolve issues where the service may have become unresponsive or is not working properly.
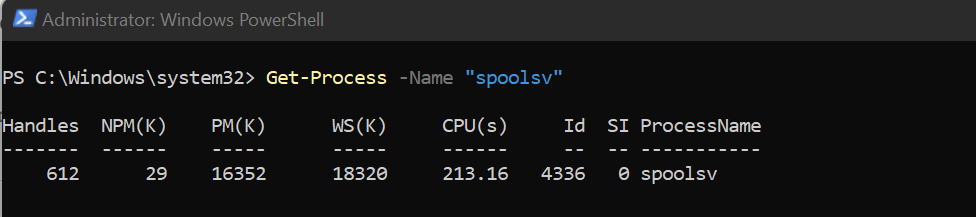
Get-Process / Stop-Process
Get-Process retrieves running processes, while Stop-Process terminates them. These commands are useful for managing system performance and closing unresponsive applications.
Let’s use the commands on the Print Spooler service. It is an important process that manages print jobs sent to the printer. If you are having issues with printing, you can troubleshoot it with these commands. Here’s how you can manage the Print Spooler process using PowerShell:
To check if the process is running, use the following command:
Get-Process -Name "spoolsv"
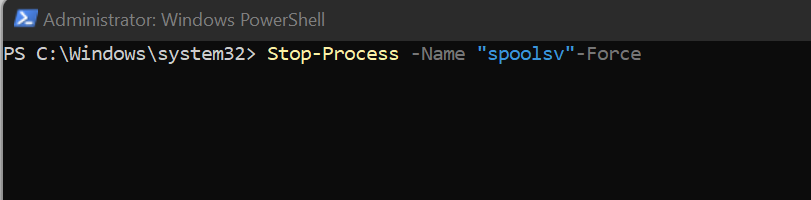
To stop the Print Spooler process, use the following command:
Stop-Process -Name "spoolsv"
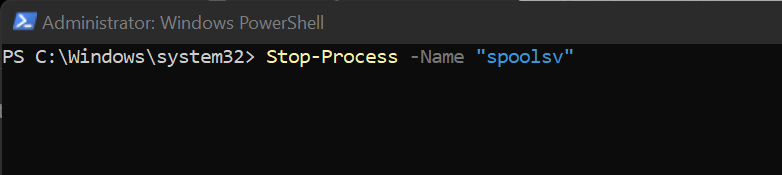
If the process does not terminate immediately, you can force stop it using this command:
Stop-Process -Name "spoolsv" -Force
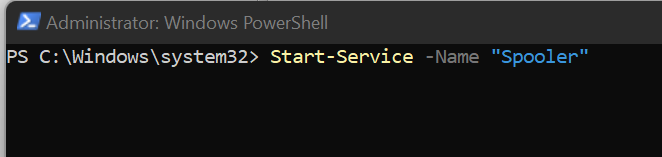
After that, you can start the process again with this command:
Start-Service -Name "Spooler"
Restart-Computer
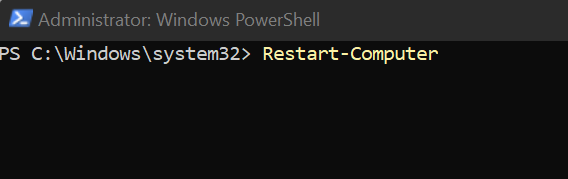
The Restart-Computer command allows you to reboot a system either locally (on the same machine) or remotely (from another computer over a network). To restart your own computer using PowerShell, simply run:
Restart-Computer
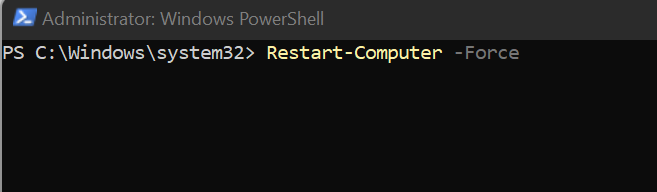
If there are applications preventing your system from shutting down, you can force a restart with:
Restart-Computer -Force
Let’s say you’ve applied a Windows Update to three computers named Workstation1, Server02, and Laptop-Office and are connected over the same network. You can complete the update process by using this command to restart all these PCs:
Restart-Computer -ComputerName "Workstation1", "Server02", "Laptop-Office"

This command will restart all specified computers remotely.
Automation and Scripting
Automation in PowerShell refers to the process of using PowerShell cmdlets and scripts to perform repetitive administrative tasks without manual intervention.
Scripting in PowerShell involves writing sequences of commands in .ps1 script files to automate workflows, manage system configurations, and interact with APIs or databases efficiently. By leveraging features like loops, conditional statements, and functions, PowerShell scripting enables IT professionals to streamline operations, reduce human errors, and improve efficiency in Windows environments.
PowerShell ISE is generally better for scripting than the regular PowerShell console because it provides a more user-friendly and feature-rich environment. So, before going further, open ISE as admin.
Scripting, on the other hand, involves writing multiple commands in a structured way within a .ps1 script file to automate complex workflows. Scripts can include variables, loops, conditions, and functions, allowing for reusable and scalable automation of tasks across systems.
ForEach-Object
ForEach-Object is a fundamental cmdlet for iterating over collections of objects in PowerShell pipelines. It processes each item in a collection one at a time, making it essential for automation tasks like modifying multiple files, applying changes to user accounts, or processing data.
A common use case for developers is renaming files in a directory:
Get-ChildItem -Path "C:\Users\HP\OneDrive\Desktop\Scripts" |

ForEach-Object { Rename-Item $_.FullName ($_.BaseName + "_backup" + $_.Extension) }

Where-Object
Where-Object filters objects in a pipeline based on specified criteria. This is particularly useful when extracting specific data from logs, filtering user accounts, or selecting files that meet a condition.
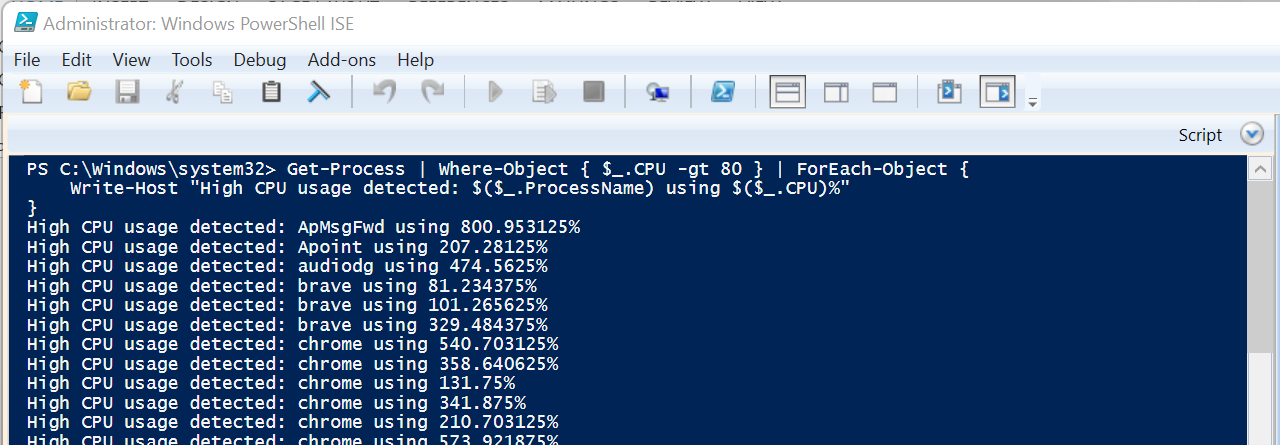
For example, if your computer is running slow, you can write an automated script that sends alerts when a process exceeds a certain CPU usage threshold:
Get-Process | Where-Object { $_.CPU -gt 80 } | ForEach-Object {

Write-Host "High CPU usage detected: $($_.ProcessName) using $($_.CPU)%"
Import-Module / Export-Module
PowerShell modules cover reusable scripts and functions to help developers manage large automation projects. Import-Module loads a module, while Export-ModuleMember allows you to expose specific functions for reuse. For instance, Import-Module ActiveDirectory enables you to manage AD objects seamlessly within scripts.
A developer might use these commands to build a custom module for managing API requests:
Export-ModuleMember -Function Invoke-APIRequest
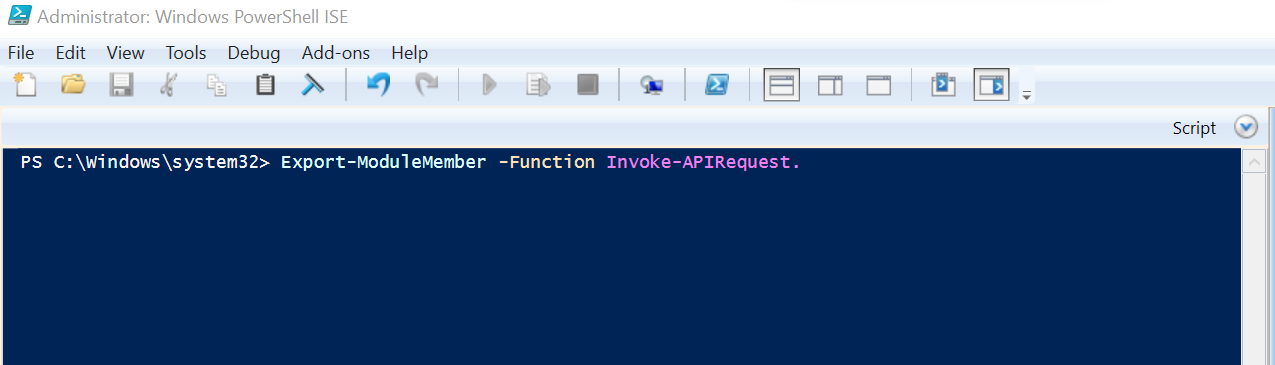
This ensures that only relevant functions are accessible, improving maintainability and collaboration.
Data Handling
PowerShell can process various data types, including JSON, CSV, and objects, making it a powerful tool for automation, data manipulation, and integration with other applications. Understanding how to handle these data types efficiently allows for seamless data exchange and improved script functionality. Below are some essential commands for working with different data formats in PowerShell.
Select-Object
The Select-Object command allows you to refine output by selecting specific properties from objects. This is useful for creating concise reports and filtering out unnecessary data.
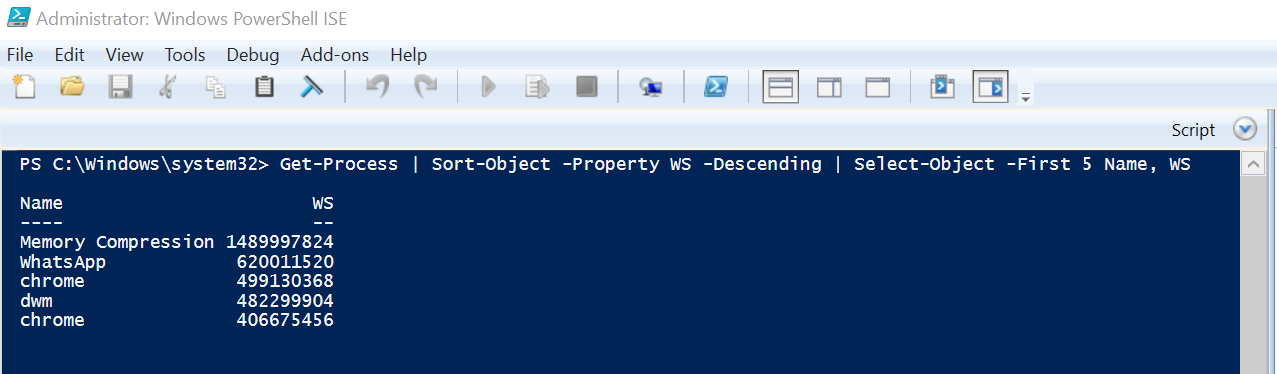
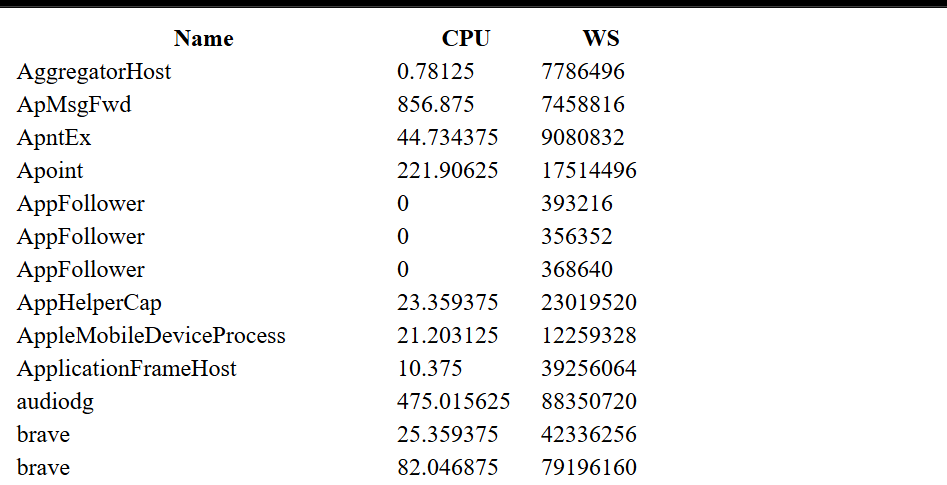
As an example, let’s use it to select the top 5 memory-consuming processes:
Get-Process | Sort-Object -Property WS -Descending | Select-Object -First 5 Name, WS
Working with JSON: ConvertTo-Json & ConvertFrom-Json
PowerShell supports JSON (JavaScript Object Notation) for exchanging data between programs, particularly in web services and APIs. The ConvertTo-Json command converts PowerShell objects into JSON format, while ConvertFrom-Json restores JSON data back into PowerShell objects.
Now, let’s try and convert the selected processes list to a JSON file:
Get-Process | Sort-Object -Property WS -Descending | Select-Object -First 5 Name, WS | ConvertTo-Json | Out-File "$env:USERPROFILE\Desktop\processes.json"

The above code will create a file named processes.json on your desktop.

Handling CSV files: Export-Csv & Import-Csv
CSV (comma-separated values) files are widely used for structured data storage and exchange. PowerShell provides the Export-Csv and Import-Csv commands to efficiently handle CSV files.
To save the selected processes to a CSV file, run the following command:
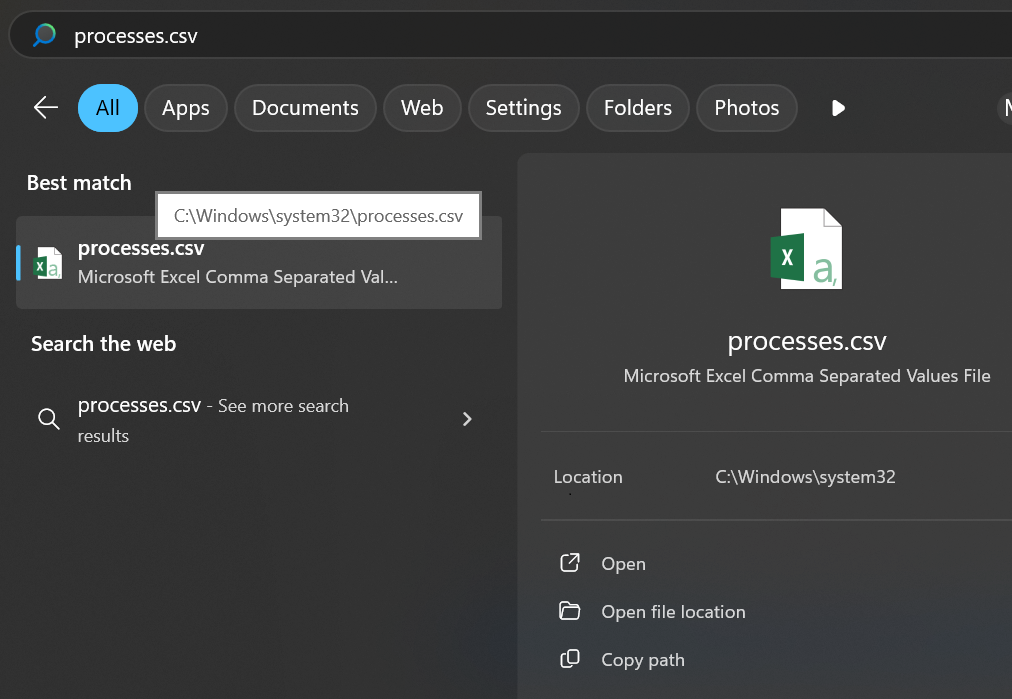
Get-Process | Sort-Object -Property WS -Descending | Select-Object -First 5 Name, WS | Export-Csv -Path "processes.csv" –NoTypeInformation

After running the command, you can search for processes.csv to locate the file on your computer.
Generating reports with ConvertTo-Html
Although HTML is not a standard data type, PowerShell allows you to create reports using the ConvertTo-Html command. This cmdlet helps visualize complex data in an easy-to-read table format, complete with styling options.
For example, the following command will generate an HTML file containing a table of running processes, which can be viewed in a web browser for better visualization.
Get-Process | Select-Object Name, CPU, WS | ConvertTo-Html -Title "Process Report" | Out-File "report.html"

Working with Remote Systems
Managing remote systems in PowerShell involves using Enter-PSSession, Invoke-Command, and New-PSSession for seamless remote administration.
Invoke-Command
Invoke-Command runs commands on remote computers, making it easier to manage multiple systems from one place. This is especially useful for automation tasks, like installing updates on several servers at the same time.
Invoke-Command -ComputerName Server1,Server2 -ScriptBlock { Install-WindowsFeature -Name Web-Server }
This PowerShell command remotely installs the IIS (Internet Information Services) web server role on Server1 and Server2 using Invoke-Command. It requires administrative privileges and PowerShell Remoting (WinRM) to be enabled on the target servers.
New-PSSession
New-PSSession creates a remote connection to another computer that stays open, allowing multiple commands to be run without reconnecting each time. This makes automation more efficient because it avoids repeatedly setting up new connections.
In contrast, Invoke-Command runs a command on a remote computer but does not keep the connection open afterward.
For example, a developer might use this:
$session = New-PSSession -ComputerName Server1

Invoke-Command -Session $session -ScriptBlock { Get-Service }
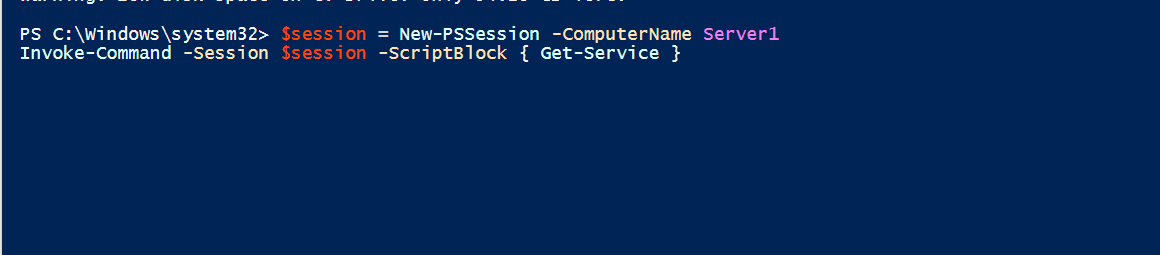
The first command establishes a remote session with Server1, and the second command runs Get-Service within that session, retrieving a list of services running on the remote machine. Because the session remains open, additional commands can be executed without needing to reconnect.
Enter-PSSession
Enter-PSSession allows you to interactively control a remote computer as if you were using its local PowerShell console. Unlike Invoke-Command, which is used for automation, Enter-PSSession is useful when you need to manually troubleshoot or configure a remote system.
For example, to start an interactive session with Server1, you can use:
Enter-PSSession -ComputerName Server1

Once connected, you can run commands directly on the remote machine. When finished, type Exit-PSSession to close the session. This method is ideal for real-time administration but should not be used for executing scripts across multiple machines.
Less Common but Powerful PowerShell Commands
We cannot exhaust the vast library of PowerShell cmdlets in one writing. However, there are some lesser-known commands that offer powerful capabilities with minimal effort. These commands can streamline workflows, automate complex tasks, and enhance scripting efficiency. Understanding and leveraging them effectively can save time and improve productivity.
Below, we explore four such commands with practical applications that demonstrate their usefulness in real-world scenarios.
Get-History/Invoke-History: Revisiting past commands
PowerShell maintains a history of executed commands, which can be accessed using Get-History. This cmdlet retrieves a list of recently executed commands, helping users review their command flow:
Get-History

Invoke-History, on the other hand, allows users to rerun a specific command from history without retyping it, saving time when debugging or repeating operations.
After running Get-History, you can pick the command you want to re-run and add its number after Invoke-History this way:
Invoke-History 1
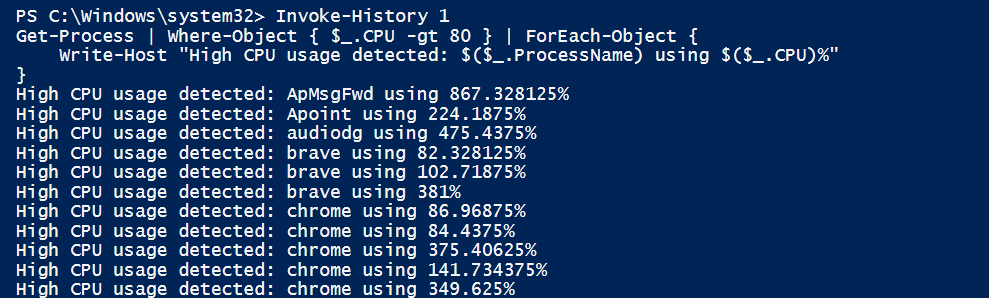
This is particularly useful when troubleshooting issues or rerunning administrative tasks that require multiple attempts.
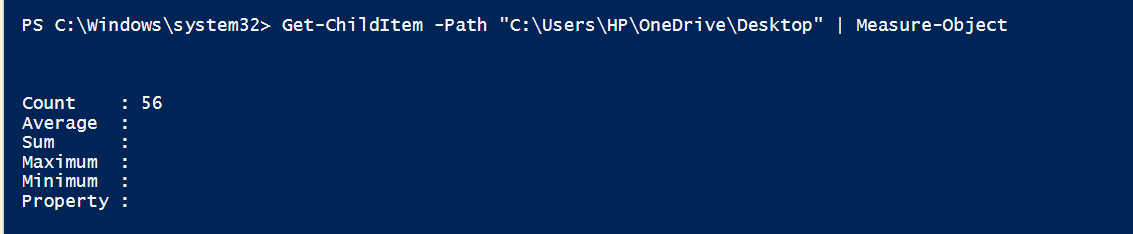
Measure-Object
Measure-Object is a handy tool that helps you gather basic statistical information about items in a collection, such as counting, averaging, and finding the minimum or maximum values. It’s useful for analyzing data in PowerShell scripts.
We could use this to count the number of items in a folder, let’s say the desktop:
Get-ChildItem -Path "C:\Users\YourUsername\OneDrive\Desktop" | Measure-Object
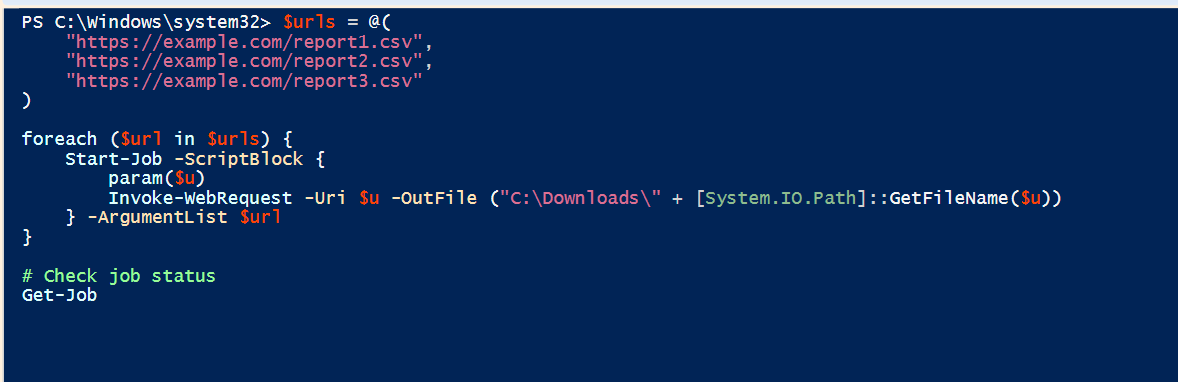
Start-Job / Get-Job: Background job management
PowerShell job commands let you run tasks in the background without stopping other work in the console. Start-Job starts a background task, while Get-Job checks on its status. This is great for tasks that take a long time, like analyzing logs or working with many files.
For instance, if you need to download five large reports from different URLs, running them sequentially would take a long time. Instead, you can use Start-Job to download each file in the background while you continue working on something else, like analyzing previously downloaded data.
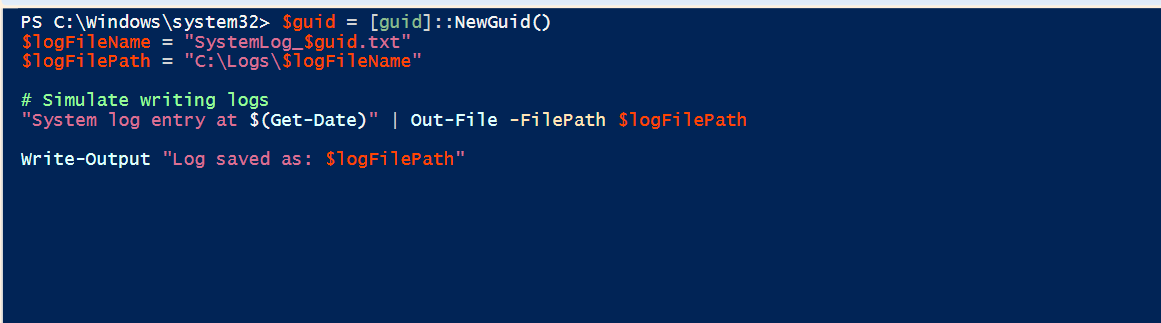
New-Guid: Generating unique IDs
A globally unique identifier (GUID) is essential for uniquely identifying objects, database entries, or configurations. The New-Guid cmdlet generates a random GUID, ensuring uniqueness across different systems and applications.
This is particularly useful for software development, automation scripts, and ensuring unique file naming conventions. Imagine you are running a script that collects system logs daily. To avoid naming conflicts, you can append a GUID to each log file’s name:
Comprehensive PowerShell Command Cheat Sheet
Here are summary tables with some codes that you will find useful:
| Get-Help | Provides help about cmdlets, functions, and scripts |
| Get-Command | Lists all available cmdlets, functions, workflows, and aliases |
| Get-Process | Displays a list of all running processes on the local computer |
| Stop-Process | Stops a running process by name or process ID |
| Get-Service | Lists the services on the local machine |
| Start-Service | Starts a specified service on the local machine |
| Stop-Service | Stops a specified service on the local machine |
| Set-Service | Configures a service’s start type (e.g., manual, automatic, or disabled) |
| Get-EventLog | Retrieves event log data from a local or remote computer |
| Clear-Host | Clears the PowerShell console window |
| Get-Content | Reads the content of a file |
| Set-Content | Writes content to a file, replacing any existing content |
| Add-Content | Appends content to a file |
| Remove-Item | Deletes files or directories |
| Get-Item | Retrieves an item (file, folder, etc.) from a specified path |
| Set-Item | Modifies an item (file, folder, etc.) at a specified path |
| Get-ChildItem | Lists the files and directories in a specified location |
| Copy-Item | Copies a file or directory to another location |
| Move-Item | Moves a file or directory to another location |
| Rename-Item | Renames a file or directory |
| Get-PSDrive | Lists all available PowerShell drives (e.g., file system, registry, etc.) |
| New-Item | Creates a new item (file, directory, etc.) |
| Test-Connection | Tests network connectivity to a remote computer (ping) |
| New-LocalUser | Creates a new local user account |
| Add-LocalGroupMember | Adds a user to a local group |
| Get-LocalUser | Lists all local user accounts on the system |
| Get-LocalGroup | Lists all local groups on the system |
| Set-ExecutionPolicy | Sets the script execution policy to control what scripts can be run |
| Get-Event | Retrieves events from event logs, including application, security, or system events |
| Get-WmiObject | Retrieves management information from local or remote computers using WMI (Windows Management Instrumentation) |
| Invoke-Command | Executes a command on a local or remote computer |
| Export-Csv | Exports data to a CSV file, useful for exporting command output in a structured format |
| Import-Csv | Imports data from a CSV file, often used for reading structured data into PowerShell |
| Get-ADUser | Retrieves information about Active Directory users (requires the Active Directory module) |
| New-ItemProperty | Creates a new property for a registry key or file system object |
| Set-ItemProperty | Modifies a property of a registry key or file system object |
| Get-Content | Retrieves the contents of a file, useful for reading text or log files |
| Get-Command -Type Cmdlet | Lists only cmdlets (command types) available in your session, filtering out other elements |
Tips for Writing and Debugging PowerShell Scripts
PowerShell is a powerful scripting language for automating tasks and managing systems. Writing efficient and error-free scripts requires following best practices and debugging effectively. Here are some key tips:
PowerShell is a powerful tool for automating tasks, but writing clear and error-free scripts is essential. Here are some key tips:

Before executing potentially destructive commands, use the -WhatIf and -Confirm parameters to simulate the command’s effects. These options allow you to preview the outcome without making actual changes, helping you avoid unintended consequences.
For example, you can run the following command:
Remove-Item C:\ImportantFile.txt -WhatIf

Adding the -WhatIf parameter here lets you view what would happen without deleting the file.
These debugging techniques can save time by allowing you to test, trace, and handle issues proactively in your scripts.

Using descriptive names for variables and functions makes your code easier to read and understand. Instead of generic names like $x, use names that clearly indicate their purpose, like $fileCount or $logFilePath. This enhances readability and makes your script more maintainable.

Comments help explain the purpose of each section of code, making it easier to understand for others or your future self. Use single-line comments for brief explanations and multi-line comments for more complex logic or detailed descriptions. This ensures your code is understandable even without prior context.

Functions allow you to break complex scripts into smaller, manageable sections. This organization makes your code more readable and reusable, enabling you to use the same logic in different parts of the script or in future projects without duplication.

Using Try-Catch blocks helps prevent your script from crashing by gracefully handling errors. When an error occurs, the Catch block provides useful feedback, allowing you to troubleshoot or handle the issue without stopping the entire process.

Consistent formatting and indentation make your code easier to read and maintain, especially in larger scripts. Proper indentation visually clarifies the structure, helping others understand the flow of your script and making it simpler to debug or extend.

Instead of adding hard-coding values into your script, use variables or configuration files. This improves flexibility and maintainability by allowing you to easily modify settings without altering the script’s core logic. It also reduces errors caused by manually changing values within the code.

You can enable script tracing by using Set-PSDebug -Trace 2. In your PowerShell session, type the following command and press Enter:
Set-PSDebug -Trace 2

This will show each step of the script as it executes, allowing you to track the flow of commands and identify where issues may arise. It’s particularly useful for troubleshooting complex scripts.

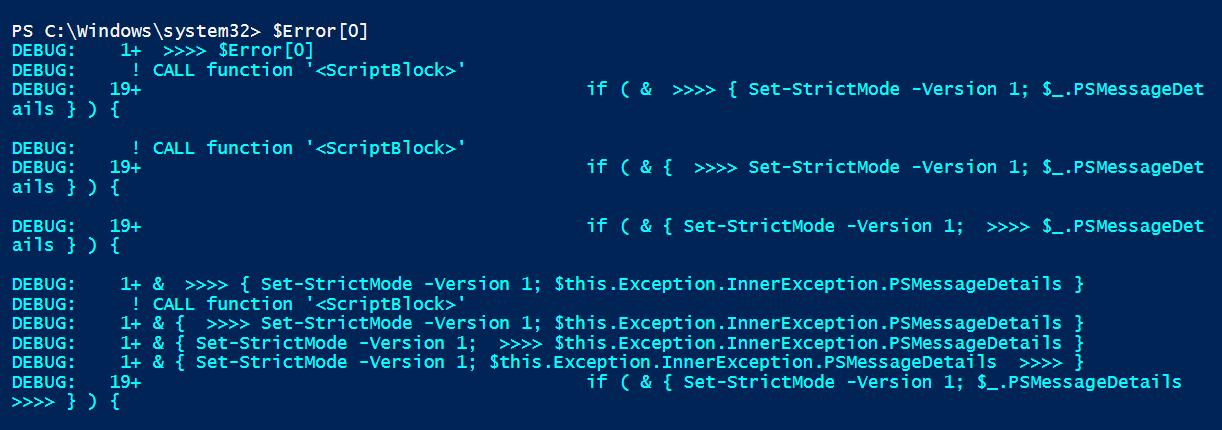
PowerShell automatically stores the last errors encountered in the $Error variable. You can examine this variable to see the most recent error messages and gather more information on why a command failed, helping you pinpoint issues in the script.
For instance, the command $Error[0] will show you the most recent error.
Common Scripting Mistakes in PowerShell Commands and How to Avoid Them
1. Not using quotation marks properly
A common mistake is not enclosing file paths or strings with spaces in quotation marks, which can lead to errors when PowerShell interprets them as separate arguments.
- Incorrect: No quotation marks used.
$FilePath = C:\Program Files\Example.txt
- Fix: Always use double quotes for file paths or strings with spaces. This ensures PowerShell correctly interprets the entire string as one argument.
$FilePath = "C:\Program Files\Example.txt"
2. Not handling null or empty values
Another common mistake is assuming a variable contains a value when it may be $null or an empty string, leading to unexpected behavior in your script.
- Incorrect: Failing to check explicitly for $null or an empty string.
if ($User) { Write-Host “User exists” }
- Fix: Explicitly check if the variable is $null or an empty string to avoid errors or false positives.
if (![string]::IsNullOrEmpty($User)) { Write-Host "User exists" }
3. Incorrect use of comparison operators
One common mistake is misusing comparison operators, especially when comparing strings or numbers. This can cause errors or incorrect results in your scripts.
- Incorrect: The comparison operator (=) is misused.
if ($Number = 10) { Write-Host “Number is 10” }
- Fix: Use the correct comparison operator (-eq for equality, not =, which is used for assignment).
if ($Number -eq 10) { Write-Host "Number is 10" }
4. Overwriting built-in variables
Sometimes, beginners accidentally overwrite built-in variables like $null or $Error, causing unexpected behavior in their scripts.
- Incorrect: The command overwrites the built-in $null variable.
$null = “Some value”
- Fix: Avoid overwriting built-in variables. Use custom names for your variables instead of using reserved names.
$CustomVariable = "Some value"
5. Using incorrect cmdlet names
PowerShell is case-insensitive, and mistyped cmdlets can lead to confusion and errors. It’s important to use the correct cmdlet names and parameters.
- Incorrect: The cmdlet is misspelled.
Get-Iteme “C:\File.txt”
- Fix: Double-check the spelling of cmdlet names and their parameters.
Get-Item "C:\File.txt"
6. Forgetting to use the correct scope
Not specifying the correct scope for variables or functions can lead to unexpected behavior, especially in loops or script blocks.
- Incorrect: The scope is not specified.
$Var = “Test”
if ($True) {
$Var = “Changed”
}
Write-Host $Var
- Fix: Specify scope when necessary to prevent unintended variable overwriting or shadowing.
$global:Var = "Test"
7. Not using Start-Job for long-running tasks
For tasks that take a long time to execute, such as querying remote systems or processing large datasets, failing to run them as background jobs can block the script from continuing.
- Incorrect: This command is a long-running task that blocks the session.
Get-ChildItem -Recurse
- Fix: Use Start-Job to run long-running tasks in the background, allowing the script to continue executing other commands.
Start-Job -ScriptBlock { Get-ChildItem -Recurse }
Sample Scripts to Try Out
The following are some simple examples of automation scripts you can run on your computer to see how things work. Before you start, remember to open Windows PowerShell ISE as an admin. Using ISE will make it easier for you to edit the commands.
1. Start with a simple greeting at boot
With this script, your computer will show a greeting message whenever you log in to your computer.
$action = New-ScheduledTaskAction -Execute "PowerShell.exe" -Argument "-WindowStyle Hidden -Command [System.Windows.MessageBox]::Show('Welcome back, $env:USERNAME! Have a great day!')"

$trigger = New-ScheduledTaskTrigger -AtLogOn

Register-ScheduledTask -TaskName "GreetingMessage" -Action $action -Trigger $trigger -User $env:USERNAME -RunLevel Highest
To be sure it worked, press Win + R and type taskschd.msc, to open the Task Scheduler.
In the left pane, expand Task Scheduler Library. On the right look for a task named GreetingMessage in the list. If it’s there, the script worked.
2. Schedule an automatic backup on a certain day of the week
This script will create a backup of your files by copying from C:\ImportantData to a backup location on drive D:\Backup every Friday. To use it, follow these steps:
Step 1: Open Windows PowerShell ISE as an admin.
Step 2: In the ISE window, click File > New to create a new script.
Step 3: Paste this code in the new script:
$source = "C:\ImportantData"

$destination = "D:\Backup"

$action = New-ScheduledTaskAction -Execute "PowerShell.exe" -Argument "-File C:\Scripts\Backup.ps1"

$trigger = New-ScheduledTaskTrigger -Weekly -DaysOfWeek Friday -At 18:00

Register-ScheduledTask -TaskName "WeeklyBackup" -Action $action -Trigger $trigger -User $env:USERNAME -RunLevel Highest
Step 4: Go to File > Save As to save the file. Navigate to C:\Scripts (you can create the folder if it doesn’t exist). Name the file Backup.ps1 and save it. Alternatively, you can use the following to save it from PowerShell:
New-Item -ItemType Directory -Path $destination -Force
Step 5: Create a new script and paste the following code:
$action = New-ScheduledTaskAction -Execute "PowerShell.exe" -Argument "-File C:\Scripts\Backup.ps1"

$trigger = New-ScheduledTaskTrigger -Weekly -DaysOfWeek Friday -At 18:00

Register-ScheduledTask -TaskName "WeeklyBackup" -Action $action -Trigger $trigger -User $env:USERNAME -RunLevel Highest
Step 6: Save the script as ScheduleBackup.ps1 in C:\Scripts.
Step 7: Navigate to C:\Scripts:
cd C:\Scripts
Step 8: Run the scheduling script:
.\ScheduleBackup.ps1
3. Receive a notification when your free disk space is low
This script monitors disk space and sends an alert if free space falls below 10GB.
Step 1: Open PowerShell ISE as an administrator.
Step 2: Click File > New to create a new script.
Step 3: Copy and paste the following code:
$disk = Get-PSDrive -Name C

$freeSpaceGB = [math]::Round($disk.Free / 1GB, 2)

# Check if free space is below 10GB

if ($freeSpaceGB -lt 10) {

    [System.Windows.MessageBox]::Show("Warning! Free disk space is low: $freeSpaceGB GB remaining.", "Disk Space Alert", 0, 48)

}
Step 4: Save the script as DiskSpaceCheck.ps1 in C:\Scripts. If C:\Scripts does not exist, you can create it using:
New-Item -ItemType Directory -Path C:\Scripts -Force
Step 5: Create a new script and paste the following code:
$action = New-ScheduledTaskAction -Execute "PowerShell.exe" -Argument "-File C:\Scripts\DiskSpaceCheck.ps1"

$trigger = New-ScheduledTaskTrigger -Daily -At 09:00

Register-ScheduledTask -TaskName "DiskSpaceCheck" -Action $action -Trigger $trigger -User $env:USERNAME -RunLevel Highest
Step 6: Save the script as ScheduleDiskCheck.ps1 in C:\Scripts.
Step 7: Run the script to schedule the task:
cd C:\Scripts

.\ScheduleDiskCheck.ps1
Conclusion
PowerShell is an incredibly powerful tool for automating tasks, managing systems, and performing complex configurations. Its versatility makes it invaluable for regular users, IT professionals, and developers alike, allowing them to automate repetitive tasks and manage remote systems efficiently.
However, you can only unlock the tool’s true potential when you understand how to use it effectively. Amongst other things, ensure to write clean and organized scripts.
Finally, we would love to hear from you. If you have any questions or comments, feel free to share them below!